Telegram Bots Book


Telegram.Bot is the most popular .NET client for Telegram Bot API, allowing developers to build bots for Telegram messaging app.
This book covers all you need to know to create a chatbot in .NET, with many concrete examples written in C#.
Begin with our Quickstart, or choose from the Table Of Content (left/top), and don’t miss our useful Frequently Asked Questions.
🧩 Installation
Install the package “Telegram.Bot” from Nuget using Nuget package manager (in your IDE or command line).
Make sure to follow the Migration Guide for v22.* if you have existing bot code.
🪄 More examples
This book is filled with ready-to-use snippets of code, but you can also find full project examples at our Telegram.Bot.Examples Github repository, featuring:
- Simple Console apps (long polling)
- Webhook ASP.NET example (with Controllers or Minimal APIs)
- Full-featured advanced solution
- Serverless Functions implementations
🔗 More useful links
| Visit our | URL |
|---|---|
| Nuget feed | https://www.nuget.org/packages/Telegram.Bot |
| Github repo | https://github.com/TelegramBots/Telegram.Bot |
| Examples repo | https://github.com/TelegramBots/Telegram.Bot.Examples |
| Telegram news channel | https://t.me/tgbot_net |
| Telegram support chat | https://t.me/tgbot_chat |
| Team page | https://github.com/orgs/TelegramBots/people |
| Recover the list of all past users messaging your bot | https://telegramservices.azurewebsites.net/ |
📖 Continue reading
Click on the right arrow (or keyboard arrow key) to go to the next page and read our quickstart guide.
You can also click on the Table of content menu (left/top) to access a specific chapter.
Quickstart
Bot Father
Before you start, you need to talk to @BotFather on Telegram. Create a new bot, acquire the bot token and get back here.
![]()
Bot token is a key that required to authorize the bot and send requests to the Bot API. Keep your token secure and store it safely, it can be used to control your bot. It should look like this:
1234567:4TT8bAc8GHUspu3ERYn-KGcvsvGB9u_n4ddy
Hello World
Now that you have a bot, it’s time to bring it to life!
Note
We recommend a recent .NET version like .NET 8, but we also support older .NET Framework (4.6.1+), .NET Core (2.0+) or .NET (5.0+)
Create a new console project for your bot and add a reference to Telegram.Bot package:
dotnet new console
dotnet add package Telegram.Bot
The code below fetches Bot information based on its bot token by calling the Bot API getMe method. Open Program.cs and use the following content:
⚠️ Replace
YOUR_BOT_TOKENwith your bot token obtained from @BotFather.
using Telegram.Bot;
var bot = new TelegramBotClient("YOUR_BOT_TOKEN");
var me = await bot.GetMe();
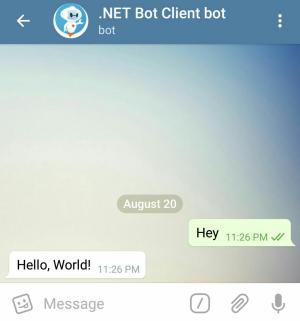
Console.WriteLine($"Hello, World! I am user {me.Id} and my name is {me.FirstName}.");
Running the program gives you the following output:
dotnet run

Hello, World! I am user 1234567 and my name is Awesome Bot.
Great! This bot is self-aware. To make the bot react to user messages, head to the next page.
Your First Chat Bot
On the previous page we got a secret bot token and used the getMe method to check our setup.
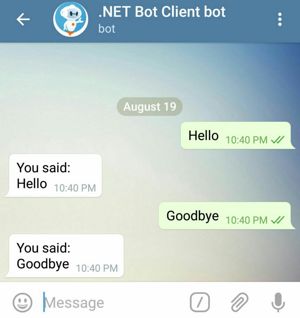
Now, it is time to make an interactive bot that gets users’ messages and replies to them like in this screenshot:
Copy the following code to Program.cs.
⚠️ Replace
YOUR_BOT_TOKENwith the bot token obtained from @BotFather.
using Telegram.Bot;
using Telegram.Bot.Types;
using Telegram.Bot.Types.Enums;

using var cts = new CancellationTokenSource();
var bot = new TelegramBotClient("YOUR_BOT_TOKEN", cancellationToken: cts.Token);
var me = await bot.GetMe();
bot.OnMessage += OnMessage;

Console.WriteLine($"@{me.Username} is running... Press Enter to terminate");
Console.ReadLine();
cts.Cancel(); // stop the bot

// method that handle messages received by the bot:
async Task OnMessage(Message msg, UpdateType type)
{
    if (msg.Text is null) return;	// we only handle Text messages here
    Console.WriteLine($"Received {type} '{msg.Text}' in {msg.Chat}");
    // let's echo back received text in the chat
    await bot.SendMessage(msg.Chat, $"{msg.From} said: {msg.Text}");
}
Run the program:
dotnet run
It runs waiting for text messages unless forcefully stopped by pressing Enter. Open a private chat with your bot in Telegram and send a text message to it. Bot should reply immediately.
By setting bot.OnMessage, the bot client starts polling Telegram servers for messages received by the bot.
This is done automatically in the background, so your program continue to execute and we use Console.ReadLine() to keep it running until you press Enter.
When user sends a message, the OnMessage(...) method gets invoked with the Message object passed as an argument (and the type of update).
We check Message.Type and skip the rest if it is not a text message.
Finally, we send a text message back to the same chat we got the message from.
If you take a look at the console, the program outputs the chatId numeric value.
In a private chat with you, it would be your userId, so remember it as it’s useful to send yourself messages.
Received Message 'test' in Private chat with @You (123456789).
Full Example
On the previous page we got a basic bot reacting to messages via bot.OnMessage.
Now, we are going to set also bot.OnUpdate and bot.OnError to make a more complete bot
Modify your Program.cs to the following:
using Telegram.Bot;
using Telegram.Bot.Polling;
using Telegram.Bot.Types;
using Telegram.Bot.Types.Enums;
using Telegram.Bot.Types.ReplyMarkups;

using var cts = new CancellationTokenSource();
var bot = new TelegramBotClient("YOUR_BOT_TOKEN", cancellationToken: cts.Token);
var me = await bot.GetMe();
bot.OnError += OnError;
bot.OnMessage += OnMessage;
bot.OnUpdate += OnUpdate;

Console.WriteLine($"@{me.Username} is running... Press Enter to terminate");
Console.ReadLine();
cts.Cancel(); // stop the bot

// method to handle errors in polling or in your OnMessage/OnUpdate code
async Task OnError(Exception exception, HandleErrorSource source)
{
    Console.WriteLine(exception); // just dump the exception to the console
}

// method that handle messages received by the bot:
async Task OnMessage(Message msg, UpdateType type)
{
    if (msg.Text == "/start")
    {
        await bot.SendMessage(msg.Chat, "Welcome! Pick one direction",
            replyMarkup: new InlineKeyboardButton[] { "Left", "Right" });
    }
}

// method that handle other types of updates received by the bot:
async Task OnUpdate(Update update)
{
    if (update is { CallbackQuery: { } query }) // non-null CallbackQuery
    {
        await bot.AnswerCallbackQuery(query.Id, $"You picked {query.Data}");
        await bot.SendMessage(query.Message!.Chat, $"User {query.From} clicked on {query.Data}");
    }
}
Run the program and send /start to the bot.
Note
/startis the first message your bot receives automatically when a user interacts in private with the bot for the first time
The bot will reply with its welcome message and 2 inline buttons for you to choose.
When you click on a button, your bot receives an Update of type CallbackQuery that is not a simple message.
Therefore it will be handled by OnUpdate instead.
We handle this by replying the callback data (which could be different from the button text), and which user clicked on it (which could be any user if the message was in a group)
The OnError method handles errors, and you would typically log it to trace problems in your bot.
Look at the Console example in our Examples repository for an even more complete bot code.
Beginner
Sending Messages
![]()
![]()
There are many different types of message that a bot can send, but let’s start with text messages.
Basic text message
await bot.SendMessage(chatId, "Hello, World!");
The chatId parameter would typically be the ID of a chat or a user that you obtained on a received message,
or it can be the @username of a public group/channel.
Advanced text message
You can send messages with more characteristics:
- text effects (using HTML, Markdown, or text entities)
- attached inline buttons
- as a reply to a message
- and more…
Important
We highly recommend you use HTML instead of Markdown because Markdown has lots of annoying aspects
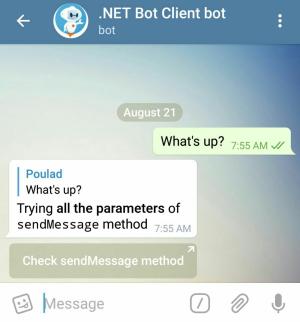
The code snippet below sends a message using various parameters:
var message = await bot.SendMessage(chatId, "Trying <b>all the parameters</b> of <code>sendMessage</code> method",
    ParseMode.Html,
    protectContent: true,
    replyParameters: update.Message.Id,
    replyMarkup: new InlineKeyboardButton("Check sendMessage method", "https://core.telegram.org/bots/api#sendmessage"));
Here text is written in HTML format and parseMode indicates that.
By passing protectContent we prevent the message (and eventual media) to be copiable/forwardable elsewhere.
It’s a good idea to make it clear to a user the reason why the bot is sending this message and that’s why we pass the user’s
message id for replyParameters.
You have the option of specifying a replyMarkup when sending messages.
Reply markups are explained in details later in this book.
Here we used an Inline Keyboard Markup with a button that attaches to the message itself.
Clicking that opens sendMessage method documentation in the browser.
Observing the Message that just got sent
Almost all of the Send* methods return the message you just sent. Let’s have a look at this object. Add this statement after the previous code.
Console.WriteLine(
    $"{message.From.FirstName} sent message {message.Id} " +
    $"to chat {message.Chat.Id} at {message.Date}. " +
    $"It is a reply to message {message.ReplyToMessage.Id} " +
    $"and has {message.Entities.Length} message entities.");
Output should look similar to this:
Awesome bot sent message 123 to chat 123456789 at 8/21/18 11:25:09 AM. It is a reply to message 122 and has 2 message entities.
Try putting a breakpoint in the code to examine all the properties on a message objects you get.
There are a few things to note:
message.Dateis a timestamp in UTC format (usemessage.Date.ToLocalTime()to convert to your local timezone).message.Text: plain text without effectsmessage.Entities: list of text effects to be applied to the plain textmessage.EntityValues: text parts covered by these entities
You can use our extension methods message.ToHtml() or message.ToMarkdown() to convert the text & entities of a Message back into HTML (recommended) or Markdown.
More message types
Discover more message types in the next pages.
Media Messages
There are different types of media messages that a bot can send (photos, videos, documents…). Fortunately, methods for sending such messages are similar (see sections below for examples)
But let’s first see what they have in common.
Providing the source file
You can provide the file data in 3 ways:
- Using the Internet URL to the file (must point to the actual file, not an HTML webpage)
- Uploading the file data as a stream
- Using the
FileIdof a file that was already sent over Telegram (ex:msg.Video.FileId,msg.Photo[^1].FileId…)
Examples in this section show all three. You will learn more about them later on when we discuss file upload and download.
Providing the caption
Media messages can optionally have a text attached to them (called “Caption”).
Similar to text message, the caption can have text effects (specifying ParseMode.HTML or Markdown, or manual captionEntities)
The Message object returned by the Send* method will have:
message.Caption: caption in plain text without effectsmessage.CaptionEntities: list of text effects to be applied to the plain textmessage.CaptionEntityValues: caption text parts covered by these entities
You can use our extension methods message.ToHtml() or message.ToMarkdown() to convert the caption & entities of a Message back into HTML (recommended) or Markdown.
Photo
![]()
![]()
Sending a photo is simple. Here is an example:
var message = await bot.SendPhoto(chatId, "https://telegrambots.github.io/book/docs/photo-ara.jpg",
    "<b>Ara bird</b>. <i>Source</i>: <a href=\"https://pixabay.com\">Pixabay</a>", ParseMode.Html);
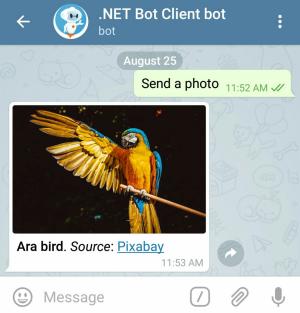
Here we sent a caption in HTML format. The user can click on Pixabay in the caption to open its URL in the browser.
The Message returned by the SendPhoto method represents a photo message because message.Photo has a value.
Its value is an array with each PhotoSize representing the same photo in different resolutions, with the largest dimensions last.
Sticker
![]()
![]()
Telegram stickers are fun. They can be static (PNG or WebP format), animated or video stickers
This code sends the same sticker twice. First by passing an URL to a WebP sticker file
and second by reusing FileId of the same sticker on Telegram servers.
var message1 = await bot.SendSticker(chatId, "https://telegrambots.github.io/book/docs/sticker-fred.webp");
var message2 = await bot.SendSticker(chatId, message1.Sticker!.FileId);

Video
![]()
![]()
You can send video via MP4 files (other formats may not be supported natively by Telegram clients and can be sent as Document)
Let’s send it differently this time by uploading the file from disk. To run this example, download the Hawk video to your disk.
await using Stream stream = File.OpenRead("./video-hawk.mp4");
await bot.SendVideo(chatId, stream);
Videos, like other multimedia messages, can have caption, reply, reply markup, and etc. You can optionally specify the duration and resolution of the video.
In the example below, we send a video of a 10 minute countdown and expect the Telegram clients to stream that long video instead of downloading it completely. We also set a thumbnail image for our video.
await bot.SendVideo(chatId, "https://telegrambots.github.io/book/docs/video-countdown.mp4",
    thumbnail: "https://telegrambots.github.io/book/2/docs/thumb-clock.jpg", supportsStreaming: true);
User should be able to seek through the video without the video being downloaded completely.
Audio
![]()
![]()
Here is the code to send an MP3 soundtrack.
var msg = await bot.SendAudio(chatId, "https://telegrambots.github.io/book/docs/audio-guitar.mp3"
    //  , performer: "Joel Thomas Hunger", title: "Fun Guitar and Ukulele", duration: 91    // optional
    );
You might be wondering why some parameters are commented out? That’s because this MP3 file has metadata on it and Telegram does a good job at reading it.
The method returns an audio Message with the metadata associated with the audio (ex: msg.Audio.Performer, msg.Audio.Duration…)
Voice
![]()
A voice message is similar to audio but has OGG format and is not shown in music player.
Here we pass a value for duration because Telegram can’t figure that out from a file’s metadata.
var msg = await bot.SendVoice(chatId, "https://telegrambots.github.io/book/docs/voice-nfl_commentary.ogg", duration: 36);
A voice message is returned from the method. Inspect the msg.Voice properties to learn more.
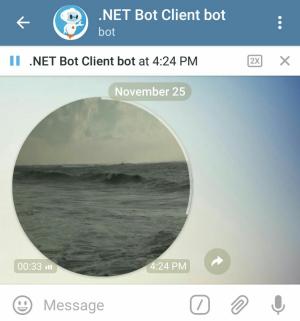
Video Note
![]()
Sending video notes is similar to video, but they are shown in circles to the user, usually short (1 minute or less) with identical width and height.
Note: Sending video note via an URL is not supported currently.
Download the Sea Waves video to your disk for this example.
await using Stream stream = File.OpenRead("path/to/video-waves.mp4");
await bot.SendVideoNote(chatId, stream, duration: 47, length: 360); // length = width = height
Document (files)
![]()
![]()
Use SendDocument method to send general files.
await bot.SendDocument(chatId, "https://telegrambots.github.io/book/docs/photo-ara.jpg",
    "<b>Ara bird</b>. <i>Source</i>: <a href=\"https://pixabay.com\">Pixabay</a>", ParseMode.Html);
Using SendDocument to send a photo or video ensure that the file data is unchanged (not recompressed and metadata are preserved)
Animation (GIF or gifv)
![]()
![]()
Use SendAnimation method to send animation files (GIF or H.264/MPEG-4 AVC video without sound).
await bot.SendAnimation(chatId, "https://telegrambots.github.io/book/docs/video-waves.mp4", "Waves");
Media group (album of multiple media)
![]()
![]()
Using SendMediaGroup method you can send a group of photos, videos, documents or audios as an album. Documents and audio files can be only grouped in an album with messages of the same type.
var messages = await bot.SendMediaGroup(chatId, new IAlbumInputMedia[]
    {
        new InputMediaPhoto("https://cdn.pixabay.com/photo/2017/06/20/19/22/fuchs-2424369_640.jpg"),
        new InputMediaPhoto("https://cdn.pixabay.com/photo/2017/04/11/21/34/giraffe-2222908_640.jpg"),
    });
Note that media groups can’t have reply markup. The caption must be set on one of the media (usually the first)
Receiving a media group (album)
When your bot receives updates for a media group, it will appear as separate messages (one per media, usually consecutive) having the same MediaGroupId property.
You should collect them progressively as you receive those messages.
There is no way to know how many medias are in the album, so here are some techniques:
- look for consecutive messages in that chat with same
MediaGroupIdand stop when it’s not the same - stop after 10 medias in the group (maximum)
- use a timeout of a few seconds not receiving new messages in that chat to determine the end
SendHtml helper method
SendHtml is an all-in-one helper method to send various type of messages in a very simple way.
It’s using HTML-formatted text, with extra tags to support the sending of medias and attached keyboard.
Note: method is only available for .NET 6+
Look at the examples below to see how easy it is to use:
Sending a simple HTML text message
var msg = await bot.SendHtml(chatId, """
    Try the new <code>SendHtml</code> method...
    It is <tg-spoiler>awesome!!</tg-spoiler>
    """);
Sending a photo with caption
var msg = await bot.SendHtml(chatId, """
    <img src="https://telegrambots.github.io/book/docs/photo-ara.jpg">
    <b>Ara bird</b>. <i>Source</i>: <a href="https://pixabay.com">Pixabay</a>
    """);
Sending a photo with spoiler
var msg = await bot.SendHtml(chatId, """
    <img src="https://telegrambots.github.io/book/docs/photo-ara.jpg" tg-spoiler>
    <b>Ara bird</b>. <i>Source</i>: <a href="https://pixabay.com">Pixabay</a>
    """);
Sending with caption above the photo
var msg = await bot.SendHtml(chatId, """
    <b>Ara bird</b>. <i>Source</i>: <a href="https://pixabay.com">Pixabay</a>
    <img src="https://telegrambots.github.io/book/docs/photo-ara.jpg">
    """);
The position of text before or after <img> and <video> determines if the caption should appear above or below the medias.
Sending a video (or animation)
var msg = await bot.SendHtml(chatId, """
    <video src="https://telegrambots.github.io/book/docs/video-countdown.mp4">
    """);
Sending a video with FileID instead of URL (and spoiler)
var msg = await bot.SendHtml(chatId, $"""
    <video src="{previousMsg.Video.FileId}" tg-spoiler>
    We use a FileID as the video src
    """);
Sending an album with 2 photos
var msg = await bot.SendHtml(chatId, """
    <img src="https://cdn.pixabay.com/photo/2017/06/20/19/22/fuchs-2424369_640.jpg">
    <img src="https://cdn.pixabay.com/photo/2017/04/11/21/34/giraffe-2222908_640.jpg">
    Album caption (attached to the last photo)
    """);
Sending an album with caption attached to first media
var msg = await bot.SendHtml(chatId, """
    <img src="https://cdn.pixabay.com/photo/2017/06/20/19/22/fuchs-2424369_640.jpg">
    Album caption (attached to the first photo)
    <img src="https://cdn.pixabay.com/photo/2017/04/11/21/34/giraffe-2222908_640.jpg">
    """);
Sending an album with caption above the medias
var msg = await bot.SendHtml(chatId, """
    Album caption above the photos
    <img src="https://cdn.pixabay.com/photo/2017/06/20/19/22/fuchs-2424369_640.jpg">
    <img src="https://cdn.pixabay.com/photo/2017/04/11/21/34/giraffe-2222908_640.jpg">
    """);
Sending an album of files with caption on each file
var msg = await bot.SendHtml(chatId, """
    <file src="https://www.w3.org/WAI/ER/tests/xhtml/testfiles/resources/pdf/dummy.pdf">
    Caption of 1st file
    <file src="https://www.w3.org/WAI/ER/tests/xhtml/testfiles/resources/pdf/dummy.pdf">
    Caption of 2nd file
    """);
Sending an album of audio files
var msg = await bot.SendHtml(chatId, """
    <file src="https://upload.wikimedia.org/wikipedia/commons/transcoded/b/bb/Test_ogg_mp3_48kbps.wav/Test_ogg_mp3_48kbps.wav.mp3">
    <file src="https://upload.wikimedia.org/wikipedia/commons/transcoded/b/bb/Test_ogg_mp3_48kbps.wav/Test_ogg_mp3_48kbps.wav.mp3">
    Listen to these audio files
    """);
Sending an album with uploaded streams
await using var stream0 = File.OpenRead(@"C:\Pictures\banner.png");
await using var stream1 = File.OpenRead(@"C:\Pictures\image.jpg");
var msg = await bot.SendHtml(chatId, """
    <img src="image.jpg">
    <img src="stream://0">
    """, streams: [stream0, stream1]);
Pass a stream list in method argument streams:, then reference them in html src="..." as stream://N or stream:N or just N
N being the indice in the streams list (starting with 0), or the filename for FileStreams
Customizing the preview for text messages
var msg = await bot.SendHtml(chatId, """
    no preview: https://github.com/TelegramBots/Telegram.Bot.Examples
    <preview disabled>
    """);

var msg2 = await bot.SendHtml(chatId, """
    Preview URL is not even in message text
    <preview url="https://github.com/TelegramBots/Telegram.Bot.Examples" small above>
    """);
Tag <preview> supports the following optional attributes (in this order):
disableordisabled(no preview even if text contains links)url="..."(force preview for this URL, even if not present in the message text)smallorlarge(size of the preview image)above
Note: the <preview> tag must appear after the text of the message, and only if no media is specified
Sending keyboards
Note: the <keyboard>..</keyboard> section must be at the end of the message
Text message with one Inline button
var msg = await bot.SendHtml(chatId, """
    Simple message <u>with a button</u>
    <keyboard>
    <button text="URL button" url="example.com" icon="4987927696177628011">
    </keyboard>
    """);
Note: the icon= at the end sets a custom emoji ID to be used (see requirements)
Photo with two callback buttons
var msg = await bot.SendHtml(chatId, """
    <img src="https://telegrambots.github.io/book/docs/photo-ara.jpg">
    Do you like this photo?
    <keyboard>
    <button text="Yes" callback="ara-yes" style="success">
    <button text="No" callback="ara-no" style="danger">
    </keyboard>
    """);
Note: the style= at the end sets a button color among:
danger, success, primary
Multi-row keyboard and various types of inline buttons
var msg = await bot.SendHtml(chatId, """
    Inline keyboard example
    <keyboard>
    <button text="URL button" url="https://github.com/TelegramBots/Telegram.Bot">
    <button text="Callback btn" callback="data">
    <row>
    <button text="Copy btn" copy="Some Text">
    <button text="Switch inline" switch_inline="query" target="user,bot">
    </row>
    </keyboard>
    """);
Notes:
- Button type
switch_inlinesupports this set oftarget=values:user,bot,group,channel
Omitting thetarget=directly types the inline query in the current chat
Invalid values liketarget="",target="*",target="any"will target all kinds of chat - Button type
app="<AppURL>"works only in private chats
Using Reply buttons
var msg = await bot.SendHtml(chatId, """
    Reply keyboard example
    <keyboard reply>
    <button text="Yes">
    <button text="No">
    <button text="Maybe">
    <row>
    <button text="Send my contact" request_contact>
    <button text="Send my location" request_location>
    <button text="Send a poll" request_poll="any">
    </keyboard>
    """);
Notes:
- Closing tag
</row>is optional. - Button type
request_poll_=".."supports values:any,quiz,regular - Button type
app="<AppURL>"works only in private chats
Force the user to reply to this message
var msg = await bot.SendHtml(chatId, """
    Please give your name in reply to this message
    <keyboard reply_force="Type your name here"></keyboard>
    """);
Removing the Reply keyboard
var msg = await bot.SendHtml(chatId, """
    Thank you
    <keyboard reply_remove></keyboard>
    """);
Note: The <keyboard> tag must be closed with </keyboard> as the last closing tag (not with a simple />)
EditHtml / EditHtmlInline helper methods
Similarly to SendHtml, the EditHtml (or EditHtmlInline) method allows to modify existing message and media groups (multiple messages) using the same system of HTML-formatted string.
var msg = await bot.EditHtml(chatId, msg.Id, """
    <img src="https://cdn.pixabay.com/photo/2018/08/21/08/38/parrot-3620776_1280.jpg">
    Changed the image for Ara with both wings. <i>Source</i>: <a href="https://pixabay.com">Pixabay</a>
    """);
Convert a message back to HTML
Our extension method message.ToHtml() can convert the text/caption & entities of a Message back to an HTML-formatted string, which makes it easier to store a formatted message in a database or file.
The extension method accepts 3 optional bool arguments:
withMediato include the<img>,<video>or<file>tag for the media contained in the message (if any)withPreviewto include<preview>tag for the attached link preview (if any)withKeyboardto include a<keyboard>section for the attached inline keyboard (if any)
Remember that these special tags are only supported by SendHtml and EditHtml methods, and won’t work with classic SendMessage/ParseMode.Html.
You can also concatenate the result of several ToHtml() (without preview/keyboard tags) in order to (re)compose a full media album, ready to be sent with SendHtml.
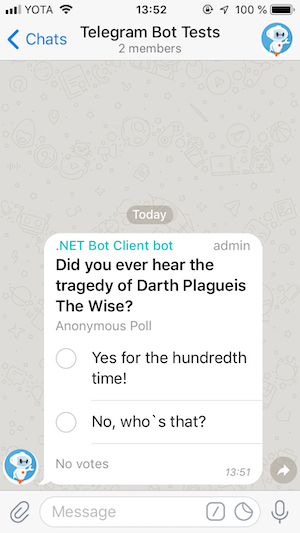
Native Poll Messages
![]()
Native poll are a special kind of message with question & answers where users can vote. Options can be set to allow multiple answers, vote anonymously, or be a quizz with a correct choice and explanation.
Send a poll
![]()
This is the code to send a poll to a chat.
var pollMessage = await bot.SendPoll("@channel_name",
    "Did you ever hear the tragedy of Darth Plagueis The Wise?",
    [
        "Yes for the hundredth time!",
        "No, who`s that?"
    ]);
You can optionally send a keyboard with a poll, both an inline or a regular one.
You’ll get the message with Poll object inside it.
Stop a poll
![]()
To close a poll you need to know original chat and message ids of the poll that you got from calling SendPoll method.
Let’s close the poll that we sent in the previous example:
Poll poll = await bot.StopPoll(pollMessage.Chat, pollMessage.Id);
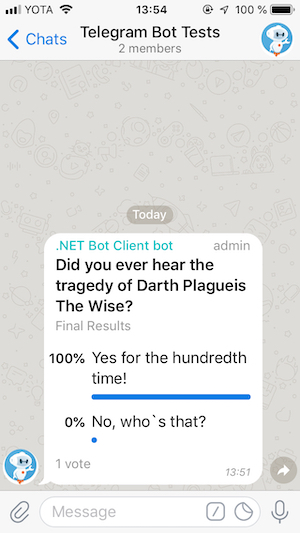
You can add an inline keyboard when you close a poll.
As a result of the request you’ll get the the final poll state with property Poll.IsClosed set to true.
If you’ll try to close a forwarded poll using message and chat ids from the received message even if your bot is the author of the poll you’ll get an ApiRequestException with message Bad Request: poll can't be stopped. Polls originated from channels is an exception since forwarded messages originated from channels contain original chat and message ids inside properties Message.ForwardFromChat.Id and Message.ForwardFromMessageId.
Also if you’ll try to close an already closed poll you’ll get ApiRequestException with message Bad Request: poll has already been closed.
Other Messages
There are other kind of message types which are supported by the client. In the following paragraphs we will look how to send contacts, venues or locations.
Contact
![]()
![]()
This is the code to send a contact. Mandatory are the parameters chatId, phoneNumber and firstName.
await bot.SendContact(chatId, "+1234567890", "Han", "Solo");

If you want to send a contact as vCard you can achieve this by adding a valid vCard string as value for the optional parameter vCard as seen in the given example below.
await bot.SendContact(chatId, "+1234567890", "Han", vcard: """
    BEGIN:VCARD
    VERSION:3.0
    N:Solo;Han
    ORG:Scruffy-looking nerf herder
    TEL;TYPE=voice,work,pref:+1234567890
    EMAIL:hansolo@mfalcon.com
    END:VCARD
    """);

Venue
![]()
![]()
The code snippet below sends a venue with a title and a address as given parameters:
await bot.SendVenue(chatId, latitude: 50.0840172f, longitude: 14.418288f,
    title: "Man Hanging out", address: "Husova, 110 00 Staré Město, Czechia");

Location
![]()
![]()
The difference between sending a location and a venue is, that the venue requires a title and address. A location can be any given point as latitude and longitude.
The following snippet shows how to send a location with the mandatory parameters:
await bot.SendLocation(chatId, latitude: 33.747252f, longitude: -112.633853f);

Dealing with chats
All messages in Telegram are sent/received on a specific chat.
The chat.Type can be one of 4 types:
ChatType.Private:
A private discussion with a user. Thechat.Idis the same as theuser.Id(positive number)ChatType.Group:
A private chat group with less than 200 usersChatType.Supergroup:
An advanced chat group, capable of being public, supporting more than 200 users, with specific user/admin rightsChatType.Channel:
A broadcast type of publishing feed (only admins can write to it)
Additional notes:
- For groups/channels, the
chat.Idis a negative number, and thechat.Titlewill be filled. - For public groups/channels, the
chat.Usernamewill be filled. - For private chat with a user, the
chat.FirstNamewill be filled, and optionally, thechat.LastNameandchat.Usernameif the user has one.
Calling chat methods
All methods for dealing with chats (like sending messages, etc..) take a ChatId parameter.
For this parameter, you can pass directly a long (the chat or user ID),
or when sending to a public group/channel, you can pass a "@chatname" string
Getting full info about a chat (GetChat)
Once a bot has joined a group/channel or has started receiving messages from a user, it can use method GetChat to get detailed info about that chat/user.
There are lots of information returned depending on the type of chat, and most are optional and may be unavailable.
Here are a few interesting ones:
- For private chat with a User:
- Birthdate
- Personal channel
- Business information
- Bio
- For groups/channels:
- Description
- default Permissions (non-administrator access rights)
- Linked ChatId (the associated channel/discussion group for this chat)
- IsForum (This chat group has topics)
- Common information for all chats:
- Photo (use
GetInfoAndDownloadFileand thephoto.BigFileIdto download it) - Active Usernames (premium user & public chats can have multiple usernames)
- Available reactions in this chat
- Pinned Message (the most recent one)
- Photo (use
Receiving chat messages
See chapter Getting Updates for how to receive updates & messages.
For groups or private chats, you would receive an update of type UpdateType.Message (which means only the field update.Message will be set)
For channel messages, you would receive an update with field update.ChannelPost.
For business messages, you would receive an update with field update.BusinessMessage.
If someone modifies an existing message, you would receive an update with one of the fields update.Edited*
Note: if you use the bot.OnMessage event, this is simplified and you can just check the UpdateType argument.
Important
By default, for privacy reasons, bots in groups receive only messages that are targeted at them (reply to their messages, inline messages, or targeted
/commands@botnamewith the bot username suffix)
If you want your bot to receive ALL messages in the group, you can either make it admin, or disable the Bot Settings : Group Privacy mode in @BotFather
Migration to Supergroup
When you create a private chat group in Telegram, it is usually a ChatType.Group.
If members count reach 200, or if you change some settings (like making it public, enabling newcomers history, or custom admin rights), the group may be migrated into a supergroup.
In such case, the Supergroup is like a separate chat with a different ID.
The old Group will have a service message MigrateToChatId with the new supergroup ID.
The new Supergroup will have a service message MigrateFromChatId with the old group ID.
Managing new members in a group
Bots can’t directly add members into a group/channel.
To invite users to join a group/channel, you can send to the users the public link https://t.me/chatusername (if chat has a username), or invite links:
Invite links
Invite links are typically of the form https://t.me/+AAS0mE-tH1nG and allow users clicking on them to join the chat.
You can send those links as a text message or as InlineKeyboardButton of type Url.
If your bot is administrator on a private (or public) group/channel, it can:
- read the (fixed) primary link of the chat:
var chatFullInfo = await bot.GetChat(chatId); // you should call this only once
Console.WriteLine(chatFullInfo.InviteLink);
- create new invite links on demand
var link = await bot.CreateChatInviteLink(chatId, "name/reason", ...);
Console.WriteLine(link.InviteLink);
See also some other methods for managing invite links.
Detecting new group members and changed member status
The simpler approach to detecting new members joining a group is to handle service messages of type MessageType.NewChatMembers: the field message.NewChatMembers will contain an array of the new User details.
Same for a user leaving the chat, with the message.LeftChatMember service message.
However, under various circumstances (bigger groups, hidden member lists, etc..), these service messages may not be sent out.
The more complex (and more reliable) approach is instead to handle updates of type UpdateType.ChatMember:
- First you need to enable this specific update type among the
allowedUpdatesparameter when callingGetUpdates,SetWebhookorStartReceiving+ReceiverOptions. - Typically, you would pass
Update.AllTypesas the allowedUpdates parameter. - After that, you will receive an
update.ChatMemberstructure for each user changing status with their old & their new status - The
OldChatMember/NewChatMemberstatus fields can be one of the derivedChatMember*class:Owner/Creator,Administrator,Member,Restricted,Left,Banned/Kicked)
Forum & Topics
Group owners can enable the Forum feature on their chat, which allows them to create topics for specialized discussions.
Messages in topics are indicated with the MessageThreadId property (or the messageThreadId: argument when sending). This value is equal to 1 for the General topic, or to the Message ID of the first message in topic.
Bots can create/edit/close/reopen/delete specific topics or the General topic.
Important: Bots can’t fetch the current list of all topics in the chat.
However, your bot can keep track of active topics by listening to these service messages (with MessageThreadId set):
MessageType.ForumTopicCreatedand themessage.ForumTopicCreatedstructureMessageType.ForumTopicEditedand themessage.ForumTopicEditedstructureMessageType.ForumTopicClosedMessageType.ForumTopicReopened- …
Reply Markup
![]()
Telegram provides two types of reply markup: Custom reply keyboards and Inline keyboards.
Since Bot API 9.4, keyboard buttons can have colors and custom emoji.
Custom reply keyboards
These are buttons visible below the textbox. Pressing such button will make the user send a message in the chat
Whenever your bot sends a message, it can pass along a special keyboard with predefined reply options.
Regular keyboards are represented by KeyboardButton and ReplyKeyboardMarkup objects.
When the user click such buttons, it will make him send a message to the chat.
It can be a simple predefined text, a contact or location information, or even a poll.
Keyboard is an array of button rows, each represented by an array of KeyboardButton objects. KeyboardButton supports text and emoji.
By default, reply keyboards are displayed until a new keyboard is sent by a bot.
Single-row keyboard markup
A reply keyboard with two buttons in a single row:
// using Telegram.Bot.Types.ReplyMarkups;

var sent = await bot.SendMessage(chatId, "Choose a response",
                                 replyMarkup: new[] { "Help me", "Call me ☎️" });
Simple text buttons can be passed directly as strings
If using
ReplyKeyboardMarkup, we would have to specifytrueon the constructor to resize the keyboard vertically for optimal fit (e.g., make the keyboard smaller if there are just two rows of buttons).
Multi-row keyboard markup
For a reply keyboard with two rows of buttons, we use an array of arrays:
// using Telegram.Bot.Types.ReplyMarkups;

var sent = await bot.SendMessage(chatId, "Choose a response", replyMarkup: new string[][]
{
    ["Help me"],
    ["Call me ☎️", "Write me ✉️"]
});
Requesting information to be sent to the bot
Some special keyboard button types can be used to request information from the user and send them to the bot.
Below are some simple examples of what you can do. More options are available in associated class properties.
new KeyboardButton("Share your location", requestLocation: true)
User’s position will be transmitted in amessage.Locationnew KeyboardButton("Share your info", requestContact: true)
User’s phone number will be transmitted in amessage.Contactnew KeyboardButton("Create a poll", PollType.Regular)
User must create a poll which gets transmitted in amessage.Pollnew KeyboardButton("Select a chat", new KeyboardButtonRequestChat(1234, false))
User must pick a group (false) or channel (true) which gets transmitted in amessage.ChatSharednew KeyboardButton("Select user(s)", new KeyboardButtonRequestUsers(5678))
User must pick 1-10 user(s) which get transmitted in amessage.UsersSharednew KeyboardButton("Launch WebApp", "https://www.example.com/game")
Launch a Mini-App
// using Telegram.Bot.Types.ReplyMarkups;

var sent = await bot.SendMessage(chatId, "Who or Where are you?", replyMarkup: new KeyboardButton[]
{
    new("Share Location", requestLocation: true),
    new("Share Contact", requestContact: true)
});
Remove keyboard
To remove the keyboard you have to send an instance of ReplyKeyboardRemove in a new message:
// using Telegram.Bot.Types.ReplyMarkups;

await bot.SendMessage(chatId, "Removing keyboard", replyMarkup: new ReplyKeyboardRemove());
Inline keyboards
These are buttons visible below a bot message. Pressing such button will NOT make the user send a message
There are times when you’d prefer to do things without sending any messages to the chat. For example, when your user is changing settings or flipping through search results. In such cases you can use Inline Keyboards that are integrated directly into the messages they belong to.
Unlike custom reply keyboards, pressing buttons on inline keyboards doesn’t result in messages sent to the chat. Instead, inline keyboards support buttons that work behind the scenes: callback buttons, URL buttons and switch to inline buttons.
You can have several rows and columns of inline buttons of mixed types.
Callback buttons
When a user presses a callback button, no messages are sent to the chat, and your bot simply receives an update.CallbackQuery instead (containing many information).
Upon receiving this, your bot should answer to that query within 10 seconds, using AnswerCallbackQuery (or else the button gets momentarily disabled)
In this example, the arrays of InlineKeyboardButton are constructed from tuples (title, callbackData):
// using Telegram.Bot.Types.ReplyMarkups;

var sent = await bot.SendMessage(chatId, "A message with an inline keyboard markup",
    replyMarkup: new InlineKeyboardButton[][]
    {
        [("1.1", "11"), ("1.2", "12")], // two buttons on first row
        [("2.1", "21"), ("2.2", "22")]  // two buttons on second row
    });
Callback data string can be up to 64 bytes. You can construct them explicitly via
new InlineKeyboardButton(..., "data")
URL buttons
Buttons of this type have a small arrow icon to help the user understand that tapping on a URL button will open an external link.
In this example we pass a single InlineKeyboardButton, and the constructor understand the second argument is an URL rather than callbackData.
// using Telegram.Bot.Types.ReplyMarkups;

var sent = await bot.SendMessage(chatId, "A message with an inline keyboard markup",
        replyMarkup: new InlineKeyboardButton("Repository Link", "https://github.com/TelegramBots/Telegram.Bot"));
You can also construct URL buttons via
new InlineKeyboardButton(.., "url")
Switch to Inline buttons
Pressing a switch to inline button prompts the user to select a chat, opens it and inserts the bot’s username into the input field. You can also pass a query that will be inserted along with the username – this way your users will immediately get some inline results they can share. In this example we use InlineKeyboardButton constructors with the types to create such buttons which will insert the bot’s username in the chat’s input field.
// using Telegram.Bot.Types.ReplyMarkups;

var sent = await bot.SendMessage(chatId, "A message with an inline keyboard markup",
    replyMarkup: new InlineKeyboardButton[]
    {
        new("switch_inline_query", InlineButtonType.SwitchInlineQuery),
        new("switch_inline_query_current_chat", InlineButtonType.SwitchInlineQueryCurrentChat)
    });
Other inline button types
Some more special inline button types can be used.
Below are some simple examples of what you can do. More options are available in associated class properties.
new InlineKeyboardButton("Copy info", InlineButtonType.CopyText, "Text to copy")
Store a text in the user clipboardnew InlineKeyboardButton("Launch WebApp", InlineButtonType.WebApp, "https://www.example.com/game")
Launch a Mini-Appnew InlineKeyboardButton("Login", InlineButtonType.LoginUrl, "https://www.example.com/telegramAuth")
Authenticate the Telegram user via a website (Domain must be configured in @BotFather)new InlineKeyboardButton("Launch game", InlineButtonType.Game)
Launch an HTML game (Game must be configured in @BotFather)new InlineKeyboardButton("Pay 200 XTR", InlineButtonType.Pay)
Customize the Pay button caption (only during a SendInvoice call)
Button styles
Since Bot API 9.4, you can set a color and a custom emoji icon for your buttons.
This applies to both custom reply keyboards and inline keyboards.
- Color can be set via the KeyboardButton
Styleproperty, among 3 available options:Danger(red),Success(green),Primary(blue) - Custom emoji can be set via the
IconCustomEmojiIdproperty, but is subject to some requirements.
await bot.SendMessage(chatId, "A button with style and custom emoji",
    replyMarkup: new InlineKeyboardButton("Styled button", "CallbackData or Url")
        { Style = KeyboardButtonStyle.Primary, IconCustomEmojiId = "5373141891321699086" });
Forward, Copy or Delete messages
You can forward, copy, or delete a single message, or even a bunch of messages in one go.
You will need to provide the source messageId(s), the source chatId and eventually the target chatId.
Note: When you use the plural form of the copy/forward methods, it will keep Media Groups (albums) as such.
Forward message(s)
![]()
![]()
You can forward message(s) from a source chat to a target chat (it can be the same chat). They will appear with a “Forwarded from” header.
// Forward a single message
await bot.ForwardMessage(targetChatId, sourceChatId, messageId);

// Forward an incoming message (from the update) onto a target ChatId
await bot.ForwardMessage(chatId, update.Message.Chat, update.Message.Id);

// Forward a bunch of messages from a source ChatId to a target ChatId, using a list of their message ids
await bot.ForwardMessages(targetChatId, sourceChatId, new int[] { 123, 124, 125 });
Copy message(s)
![]()
![]()
If you don’t want the “Forwarded from” header, you can instead copy the message(s).
This will make them look like new messages.
// Copy a single message
await bot.CopyMessage(targetChatId, sourceChatId, messageId);

// Copy an incoming message (from the update) onto a target ChatId
await bot.CopyMessage(targetChatId, update.Message.Chat, update.Message.Id);

// Copy a media message and change its caption at the same time
await bot.CopyMessage(targetChatId, update.Message.Chat, update.Message.Id,
    caption: "New <b>caption</b> for this media", parseMode: ParseMode.Html);

// Copy a bunch of messages from a source ChatId to a target ChatId, using a list of their message ids
await bot.CopyMessages(targetChatId, sourceChatId, new int[] { 123, 124, 125 });
Delete message(s)
![]()
![]()
Finally you can delete message(s).
This is particularly useful for cleaning unwanted messages in groups.
// Delete a single message
await bot.DeleteMessage(chatId, messageId);

// Delete an incoming message (from the update)
await bot.DeleteMessage(update.Message.Chat, update.Message.Id);

// Delete a bunch of messages, using a list of their message ids
await bot.DeleteMessages(chatId, new int[] { 123, 124, 125 });
Check if a message is a forward
When receiving an update about a message, you can check if that message is “Forwarded from” somewhere,
by checking if Message.ForwardOrigin is set:
Console.WriteLine(update.Message.ForwardOrigin switch
{
    MessageOriginChannel moc     => $"Forwarded from channel {moc.Chat.Title}",
    MessageOriginUser mou        => $"Forwarded from user {mou.SenderUser}",
    MessageOriginHiddenUser mohu => $"Forwarded from hidden user {mohu.SenderUserName}",
    MessageOriginChat moch       => $"Forwarded on behalf of {moch.SenderChat}",
    _                            => "Not forwarded"
});
Intermediate
Working with Updates & Messages
Getting Updates
There are two mutually exclusive ways of receiving updates for your bot — the long polling using getUpdates method on one hand and Webhooks on the other. Telegram is queueing updates until the bot receives them either way, but they will not be kept longer than 24 hours.
- With long polling, the client is actively requesting updates from the server in a blocking way. The call returns if new updates become available or a timeout has expired.
- Setting a webhook means you supplying Telegram with a location in the form of an URL, on which your bot listens for updates. Telegram need to be able to connect and post updates to that URL.
Update types
![]()
Each user interaction with your bot results in an Update object.
It could be about a Message, some changed status, bot-specific queries, etc…
You can use update.Type to check which kind of update you are dealing with.
However this property is slow and just indicates which field of update is set, and the other fields are all null.
So it is recommended to instead directly test the fields of Update you want if they are non-null, like this:
switch (update)
{
    case { Message: { } msg }: await HandleMessage(msg); break;
    case { EditedMessage: { } editedMsg }: await HandleEditedMessage(editedMsg); break;
    case { ChannelPost: { } channelMsg }: await HandleChannelMessage(channelMsg); break;
    case { CallbackQuery: { } cbQuery }: await HandleCallbackQuery(cbQuery); break;
    //...
}
Message types
![]()
If the Update is one of the 6 types of update containing a message (new or edited? channel? business?), the contained Message object itself can be of various types.
Like above, you can use message.Type to determine the type but it is recommended to directly test the non-null fields of Message using if or switch.
There are a few dozens of message types, grouped in two main categories: Content and Service messages
Content messages
These messages represent actual content that someone posted.
Depending on which field is set, it can be:
Text: a basic text message (with itsEntitiesfor font effects, andLinkPreviewOptionsfor preview info)Photo,Video,Animation(GIF),Document(file),Audio,Voice,PaidMedia: those are media contents which can come with aCaptionsubtext (and itsCaptionEntities)VideoNote,Sticker,Dice,Game,Poll,Venue,Location,Story: other kind of messages without a caption
You can use methods message.ToHtml() or message.ToMarkdown() to convert the text/caption & entities into HTML (recommended) or Markdown.
Service messages
All other message types represent some action/status that happened in the chat instead of actual content.
We are not listing all types here, but it could be for example:
- members joined/left
- pinned message
- chat info/status/topic changed
- payment/passport/giveaway process update
- etc…
You can use message.IsServiceMessage to determine if a message is content or service.
Common properties
There are additional properties that gives you information about the context of the message.
Here are a few important properties:
Id: the ID that you will use if you need to reply or call a method acting on this messageChat: in which chat the message arrivedFrom: which user posted itDate: timestamp of the message (in UTC)ReplyToMessage: which message this is a reply toForwardOrigin: if it is a Forwarded messageMediaGroupId: albums (group of media) are separate consecutive messages having the same MediaGroupIdMessageThreadId: the topic ID for Forum/Topic type chats
Sequential vs parallel updates
Whether polling in a loop or with webhook,
you will usually receive updates in sequential order of increasing update.Id, one after the other.
If you want to parallelize the handling of updates for improved performance, it is up to your async code.
There are multiple possible approaches:
- write the received update into a Threading Channel
You will need separate consumer Task(s) to process these updates (see Background Service) - do the same but with a
ConcurrentQueueor aQueue(withlock) - spawn a new sub-Task for each update, using
Task.Runfor example
(if your bot is heavily used, make sure you don’t overload your server with concurrent tasks) - or something as simple as:
bot.OnUpdate += async update => OnUpdate(update);
However if you’re gonna process the updates in parallel, you might want to ensure your code:
- is thread-safe or async-safe when accessing common resources
- has no state-consistency issue processing updates in unsequential order
Example projects
Long polling
- Console application. Demonstrates a basic bot with some commands.
- Advanced console application. Demonstrates the use of many advanced programming features.
Webhook
- ASP.NET Core web application with Minimal APIs
- ASP.NET Core web application with Controllers
- Azure Functions
- AWS Lambda
Long Polling
Long Polling is done by calling getUpdates actively.
With our library, this can be done in one of three ways:
By setting bot.OnUpdate (and/or bot.OnMessage)
Setting those events will automatically start a background polling system which will call your events accordingly:
OnMessagefor updates about messages (new or edited Message, Channel Post or Business Messages)OnUpdatefor all other type of updates (callback, inline-mode, chat members, polls, etc..)
Note
If you don’t set OnMessage, the OnUpdate event will be triggered for all updates, including messages.
By using the StartReceiving method (or ReceiveAsync)
Those methods start a polling system which will call your method on incoming updates.
As arguments, you can pass either lambdas, methods or a class derived from IUpdateHandler that implements the handling of Update and Error.
By calling GetUpdates manually in a loop
You can specify a timeout so that the call blocks for up to X seconds, waiting for an incoming update
Here is an example implementation:
int? offset = null;
while (!cts.IsCancellationRequested)
{
    var updates = await bot.GetUpdates(offset, timeout: 2);
    foreach (var update in updates)
    {
        offset = update.Id + 1;
        try
        {
            // put your code to handle one Update here.
        }
        catch (Exception ex)
        {
            // log exception and continue
        }
        if (cts.IsCancellationRequested) break;
    }
}
Webhooks
![]()
With Webhook, your web application gets notified one by one, automatically by Telegram when new updates arrive for your bot.
Your application will receive HTTP POST requests with an Update structure in the JSON body.
Since version 22.5 of the library, you no longer need to configure the JSON serialization settings for your WebApp in most cases. But if necessary, refer to section Configure JSON serialization settings below.
Here are example codes for handling updates, depending on the types of ASP.NET projects:
- ASP.NET Core with Controllers (MVC)
// Add this action in a controller class (like BotController.cs): [HttpPost] public async Task HandleUpdate([FromBody] Update update) { // put your code to handle one Update here. } - ASP.NET Core with Minimal APIs
app.MapPost("/bot", (Update update) => HandleUpdate(update)); ... async Task HandleUpdate(Update update) { // put your code to handle one Update here. } - Old ASP.NET 4.x support
public async Task<IHttpActionResult> Post()
{
    Update update;
    using (var body = await Request.Content.ReadAsStreamAsync())
        update = System.Text.Json.JsonSerializer.Deserialize<Update>(body, JsonBotAPI.Options);
    await HandleUpdate(update);
    return Ok();
}
Now that your update handler code is ready, you need to instruct Telegram to start sending updates to your URL, by running:
var bot = new TelegramBotClient("YOUR_BOT_TOKEN");
await bot.SetWebhook("https://your.public.host:port/bot", allowedUpdates: []);
Great! You can now deploy your app to your webapp host machine.
Note: If you decide to switch back to Long Polling, remember to call bot.DeleteWebhook()
Common issues
- You need a supported certificate
If your host doesn’t provide one, or you want to develop on your own machine, consider using ngrok:
See this useful step-by-step guide - You must use HTTPS (TLS 1.2+), IPv4, and ports 443, 80, 88, or 8443
- The Official webhook guide gives a lot of details
- Most web hostings will recycle your app after some HTTP inactivity (= stop your app and restart it on the next HTTP request)
To prevent issues with this:- Search for an Always-On option with your host (usually not free)
- Make sure your web app can be safely stopped (saved state) and restarted later (reloading state)
- Make sure you don’t have critical background code that needs to keep running at all time
- Have a service like cron-job.org ping your webapp every 5 minutes to keep it active. (host will likely still recycle your app after a few days)
- Host your app on a VPS machine rather than a webapp host.
Updates are posted one by one to your webapp
If there are new pending updates, Telegram servers will send a POST request to your Webhook URL with the next update you didn’t acknowledge yet.
(based on incremental update.Id values)
Note
For high-load/busy webhook bots, Bot API may send multiple updates in parallel to your endpoint, in which case you may need a more advanced system to collect & reorder them by ID to ensure correct processing order.
As long as your webapp doesn’t acknowledge the update with a 200 OK within a few seconds, Telegram will keep resending the same update to your endpoint.
In particular, this will happen if your code is throwing an unhandled exception or taking too long to process an update.
A simple way to prevent handling the same update.Id twice is:
if (update.Id <= LastUpdateId) return;
LastUpdateId = update.Id;
// your code to handle the Update here.
Initially Telegram will resend the failed update quickly, then with increasing intervals up to a few minutes. So if your webapp wasn’t working for some time, you may have to wait a bit to receive a POST request with the next update.
If you need to process the incoming updates faster, in parallel, you will want to delegate their handling separately and acknowledge the POST request by returning from the controller immediately.
For more details, refer to this section of our documentation.
Configure JSON serialization settings
Telegram updates & requests are sent using JSON payloads with snake_case property names.
Such serialization is normally achieved thanks to Telegram.Bot.JsonBotAPI.Options serialization settings.
Since version 22.5, the library should already be compatible with Telegram Webhook without needing extra configuration for your WebApp.
In some rare cases (like Native AOT / Blazor / Trimming), this might still be necessary and here is how to configure your project:
- ASP.NET Core with Minimal APIs
Locate the linebuilder.Build();(in Program.cs) and insert this line above:builder.Services.ConfigureTelegramBot<Microsoft.AspNetCore.Http.Json.JsonOptions>(opt => opt.SerializerOptions); - ASP.NET Core with Controllers (recommended method for .NET 6.0+)
Add the nuget packageTelegram.Bot.AspNetCoreto your project.
Locate the lineservices.AddControllers();(in Program.cs or Startup.cs) and add this line below:services.ConfigureTelegramBotMvc(); - ASP.NET Core with Controllers (any .NET version)
Locate the lineservices.AddControllers();(in Program.cs or Startup.cs) and add this line below:services.ConfigureTelegramBot<Microsoft.AspNetCore.Mvc.JsonOptions>(opt => opt.JsonSerializerOptions);
Downloading files
To download a file, you have to know its file identifier: FileId.
You find this property in the Animation, Audio, Document, Video, VideoNote, Voice, Sticker objects from a message.
For a Photo, you get an array PhotoSize[] with FileId for each resolution variants.
The last entry contains the best quality: message.Photo[^1].FileId
For ChatPhoto, there is a BigFileId for best quality, and SmallFileId for low resolution.
Methods for downloading a file
Downloading a file from Telegram is done in two steps:
- Get file information with
GetFilemethod. - Download the file with the
DownloadFilemethod
var fileId = update.Message.Video.FileId;
var tgFile = await bot.GetFile(fileId);

await using var stream = File.Create("../downloaded.mp4");
await bot.DownloadFile(tgFile, stream);
For your convenience, the library provides a helper function that does both steps: GetInfoAndDownloadFile
await using var ms = new MemoryStream();
var tgFile = await bot.GetInfoAndDownloadFile(fileId, ms);
Notes:
- ⚠️ Bot API can download files up to 20 MB only. For bigger files, consider using library WTelegramBot
- When downloading into a
MemoryStream, remember to reset itsPositionbefore processing the content. - The
tgFile.FilePathreturned byGetFilecan be used to build the web URL accessing the file:https://api.telegram.org/file/bot<TOKEN>/<FilePath>.
(don’t give this URL publicly! your TOKEN must remain secret!)
Uploading files
We recommend you first read the official documentation on sending files, it contains important information.
Upload local file
To upload a file from your machine, open the stream and call one of the sending methods:
await using var stream = File.OpenRead("../hamlet.pdf");
var message = await bot.SendDocument(chatId, stream, "The Tragedy of Hamlet,\nPrince of Denmark");
You can also specify the public filename manually, or use a MemoryStream:
var buffer = File.ReadAllBytes("../hamlet.pdf");
await using var ms = new MemoryStream(buffer);
var message = await bot.SendDocument(chatId, InputFile.FromStream(ms, "Tragedy.pdf"),
                                     "The Tragedy of Hamlet,\nPrince of Denmark");
Be aware of limitation for this method - 10 MB max size for photos, 50 MB for other files. For bigger files, consider using library WTelegramBot
Upload by file identifier
If the file is already stored somewhere on the Telegram servers, you don’t need to reupload it: each file object has a FileId property. Simply pass this FileId as a parameter instead of uploading. There are no size limits for files sent this way.
var fileId = update.Message.Photo[^1].FileId;
var message = await bot.SendPhoto(chatId, fileId);
Upload by URL
Provide Telegram with an HTTP URL for the file to be sent. Telegram will download and send the file. 5 MB max size for photos and 20 MB max for other types of content.
var message = await bot.SendPhoto(chatId, "https://picsum.photos/640/480.jpg");
Inline Mode
![]()
Telegram bots can be queried directly in the chat or via inline queries.
To use inline queries in your bot, you need to set up inline mode by command:
Import Telegram.Bot.Types.InlineQueryResults namespace for inline query types.
There are two types that allow you to work with inline queries - InlineQuery and ChosenInlineResult:
switch (update.Type)
{
    case UpdateType.InlineQuery:
        await OnInlineQueryReceived(bot, update.InlineQuery!);
        break;
    case UpdateType.ChosenInlineResult:
        await OnChosenInlineResultReceived(bot, update.ChosenInlineResult!);
        break;
};
InlineQuery
![]()
Suppose we have two arrays:
private readonly string[] sites = { "Google", "Github", "Telegram", "Wikipedia" };
private readonly string[] siteDescriptions =
{
    "Google is a search engine",
    "Github is a git repository hosting",
    "Telegram is a messenger",
    "Wikipedia is an open wiki"
};
So we can handle inline queries this way:
async Task OnInlineQueryReceived(ITelegramBotClient bot, InlineQuery inlineQuery)
{
    var results = new List<InlineQueryResult>();

    var counter = 0;
    foreach (var site in sites)
    {
        results.Add(new InlineQueryResultArticle(
            $"{counter}", // we use the counter as an id for inline query results
            site, // inline query result title
            new InputTextMessageContent(siteDescriptions[counter])) // content that is submitted when the inline query result title is clicked
        );
        counter++;
    }

    await bot.AnswerInlineQuery(inlineQuery.Id, results); // answer by sending the inline query result list
}
InlineQueryResult is an abstract type used to create a response for inline queries. You can use these result types for inline queries: InlineQueryResultArticle for articles, InlineQueryResultPhoto for photos, etc.
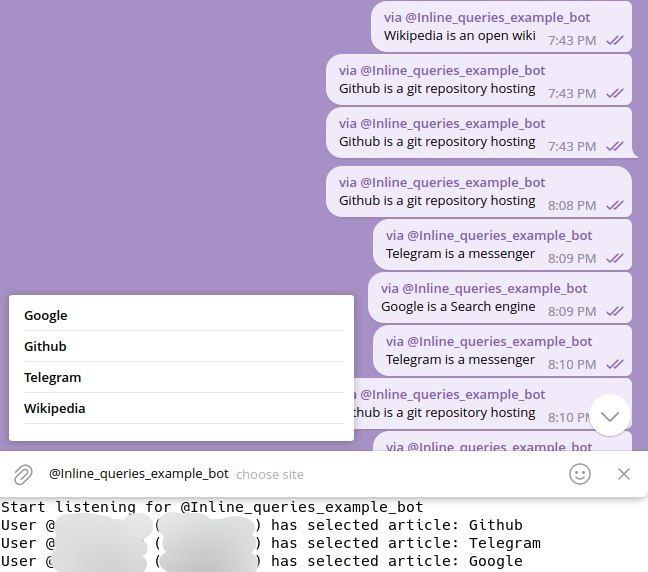
ChosenInlineResult
![]()
This type helps to handle chosen inline result. For example, you may want to know which result users chose:
Task OnChosenInlineResultReceived(ITelegramBotClient bot, ChosenInlineResult chosenInlineResult)
{
    if (uint.TryParse(chosenInlineResult.ResultId, out var resultId) // check if a result id is parsable and introduce variable
        && resultId < sites.Length)
    {
        Console.WriteLine($"User {chosenInlineResult.From} has selected site: {sites[resultId]}");
    }

    return Task.CompletedTask;
}
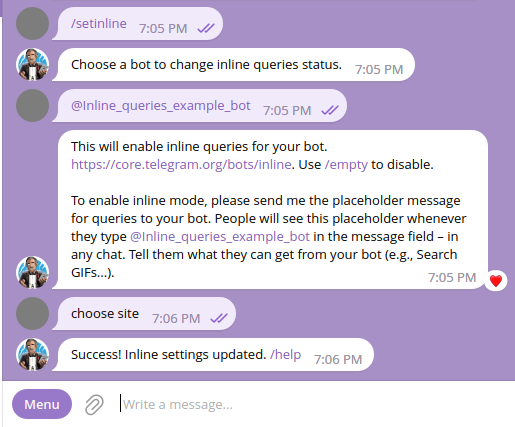
To use the feature you need to enable “inline feedback” in BotFather by /setinlinefeedback command:
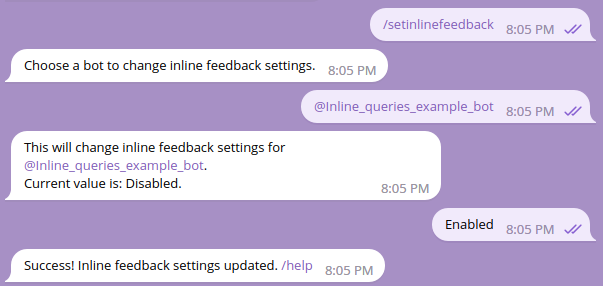
Final result:
List of helpers in the library
Our library is mainly a bridge between your application and Telegram Bot API.
However, to simplify your life, we also provide a set of additional helpers methods and services, listed below.
For more advanced features, you can look at high-level bot frameworks constructed around our library
Message and format helpers
message.MessageLink(): Returns the t.me/… link to this message, ornullif the message was not in a Supergroup or Channelmessage.IsServiceMessage: Detect service messages vs content messagesmessage.ToHtml()to convert the message to HTML format (Recommended)message.ToMarkdown()to convert the message to Markdown format (Not recommended)HtmlText.Escape()to escape reserved HTML characters in a stringHtmlText.ToPlain()to convert HTML string to plain text (removing tags)HtmlText.PlainLength()to get the number of characters of plain text from HTMLHtmlText.Truncate()to truncate HTML string to a number of plain-text characters (while preserving the formatting)Markdown.Escape()to escape reserved Markdown characters in a stringbot.SendHtml()to send HTML-formatted messages, with support for sending photos/videos and keyboards from one stringbot.EditHtml()to edit message and media group via an HTML stringbot.EditHtmlInline()same as above to edit an inline message (inline results)message.ToHtml(media, preview, keyboard)to convert the message to SendHtml format, possibly including media, preview link and inline buttons tags
Easier information
chat.ToString()&user.ToString()to easily print/log information about the chat/userChatMemberhas propertiesIsAdminandIsInChatto simplify testing if the user is an admin or currently inside the chatChatMemberhas propertyExpireDate(generic equivalent forUntilDatesubclass properties)ChatMemberRestrictedhas a propertyIsMutedto quickly determine if the user cannot send any type of message
Updates
bot.DropPendingUpdates()to clear the pending updates queueUpdate.AllTypesis a constant array containing allUpdateTypes, usable withGetUpdates/SetWebhookbot.OnMessage/bot.OnUpdateevents to easily subscribe to messages or updates (these automatically start a background task to poll for updates)
Telegram files
bot.GetInfoAndDownloadFileto get file information and download it in a single callTelegramBotClient.GetFileIdType(fileId)to determine the type of object stored behind a FileId (photo, video, etc)
Simplified constructors and implicit conversions
We’ve added easier ways to construct various instances from other types, especially when passing arguments to methods:
ChatIdfrom aChator aUserclass, so you can pass these directly for thechatId:argumentChatPermissions(bool)andChatAdministratorRights(bool)constructors to set all Can* fields to the specified valueReactionTypefrom an emoji (string) or a customEmojiId (long)ReplyParametersfrom a messageId (int), or aMessageclass, so you can pass these directly for thereplyParameters:argumentLinkPreviewOptionsfrom aboolwheretruemeans to disable the previewLinkPreviewOptionsfrom astringURL to show preview for this linkLabeledPricefrom tuple(string label, long amount)BotCommandfrom tuple(string command, string description)BotCommandScopehas several static methods to construct scopesInputFilefrom astring(fileId or URL), or aStream, or a received media file, ornullInputPollOptionfrom astringLoginUrlfrom/to astring
also, any class containing only one field (eg: WebAppInfo) has an implicit conversion from/to that field’s type.
Examples:
await bot.RestrictChatMember(chatId, userId, new ChatPermissions(true)); // unmute
await bot.SetMessageReaction(msg.Chat, msg.Id, ["👍"]);
await bot.SendMessage(msg.Chat, "Visit t.me/tgbot_net", replyParameters: msg, linkPreviewOptions: true);
await bot.SendInvoice(chatId, "Product", "Description", "ProductID", "XTR", [("Price", 500)]);
await Bot.SetMyCommands([("/start", "Start the bot"), ("/privacy", "Privacy policy")], BotCommandScope.AllPrivateChats());
await bot.SendPhoto(msg.Chat, "https://picsum.photos/310/200.jpg");
await bot.SendVideo(msg.Chat, msg.Video, "Sending your video back");
await bot.SendPoll(chatId, "question", ["answer1", "answer2"]);
Reply Markup
Keyboards can be easily constructed by passing directly the following type of objects for the replyMarkup: parameter:
| Type | Meaning |
|---|---|
string | single keyboard text button |
string[] or List<string> | keyboard text buttons on one row |
string[][] or List<List<string>> | multiple keyboard text buttons |
KeyboardButton | single keyboard button |
KeyboardButton[] orList<KeyboardButton> | multiple keyboard buttons on one row |
KeyboardButton[][] orList<List<KeyboardButton>> orIEnumerable<KeyboardButton>[] | multiple keyboard buttons |
InlineKeyboardButton | single inline button |
InlineKeyboardButton[] orList<InlineKeyboardButton> | inline buttons on 1 row |
InlineKeyboardButton[][] orList<List<InlineKeyboardButton>> orIEnumerable<InlineKeyboardButton>[] | multiple inline buttons |
Additionally, InlineKeyboardButton can be implicitly constructed from a tuple (string text, string callbackOrUrl) for Callback or Url buttons, with optional button style & icon
await bot.SendMessage(msg.Chat, "Visit our website", replyMarkup: ("Click here", "https://telegrambots.github.io/book/", KeyboardButtonStyle.Success, "5447410659077661506"));
await bot.SendMessage(botOwnerId, $"Annoying user: {msg.From}", replyMarkup: new InlineKeyboardButton[]
    { ("Ban him", $"BAN {msg.From.Id}", KeyboardButtonStyle.Danger), ("Mute him", $"MUTE {msg.From.Id}") });
await bot.SendMessage(msg.Chat, "Keyboard buttons:", replyMarkup: new string[] { "MENU", "INFO", "LANGUAGE" });
Constructing dynamically
ReplyKeyboardMarkup & InlineKeyboardMarkup have methods to help you construct keyboards dynamically:
var replyMarkup = new InlineKeyboardMarkup()
    .AddButton(new InlineKeyboardButton("Link to Repository", "https://github.com/TelegramBots/Telegram.Bot"))
    .AddNewRow().AddButton("callback").AddButton("caption", "data")
    .AddNewRow("with", "three", "buttons")
    .AddNewRow().AddButtons("A", "B", new("switch", InlineButtonType.SwitchInlineQueryCurrentChat));
And you can use new ReplyKeyboardMarkup(true) to resize the reply keyboard.
Mini-App and Login widget validation
AuthHelpers.ParseValidateDatashould be used to confirm the authenticity of data received along Telegram’s Mini-Apps or the Login Widget javascript requests
Advanced topics
Telegram Login Widget
You can use InlineKeyboardButton.WithLoginUrl to easily initiate a login connection to your website using the user’s Telegram account credentials.
replyMarkup: InlineKeyboardButton.WithLoginUrl("login",
                 new LoginUrl { Url = "https://yourdomain.com/url" })
You’ll need to associate your website domain with your bot by sending /setdomain to @BotFather.
See official documentation about Telegram Login Widget for more information.
Server-side, you can use our separate repository Telegram.Bot.Extensions.LoginWidget
to validate the user credentials, or to generate a Javascript to show the login widget directly on your website.
Working Behind a Proxy
Note
If you’re using .NET 5.0 or later, you can just set the environment variable
HTTPS_PROXYto start using a proxy. More details »
TelegramBotClient constructor allows you to pass a custom HttpClient to be used for Bot API connections, and which can be configured for using a proxy.
This guide covers using three different proxy solutions.
MTProxy (MTProto tg://proxy) are not supported for Bot API requests.
If you are in a country, such as Iran or Russia, where HTTP and SOCKS proxy connections to Telegram servers may be blocked, consider using a VPN, using Tor Network, or hosting your bot in other jurisdictions.

HTTP Proxy
You can configure HttpClient with WebProxy and pass it to the Bot client.
// using System.Net;
// using System.Net.Http;

WebProxy webProxy = new (Host: "https://example.org", Port: 8080)
{
    // Credentials if needed:
    Credentials = new NetworkCredential("USERNAME", "PASSWORD")
};
HttpClient httpClient = new (
    new HttpClientHandler { Proxy = webProxy, UseProxy = true, }
);

var bot = new TelegramBotClient("YOUR_API_TOKEN", httpClient);
SOCKS5 Proxy
As of .NET 6, SocketsHttpHandler is able to use Socks4, Socks4a and Socks5 proxies!
// using System.Net;
// using System.Net.Http;

WebProxy proxy = new ("socks5://127.0.0.1:9050")
{
    Credentials = new NetworkCredential("USERNAME", "PASSWORD")
};
HttpClient httpClient = new (
    new SocketsHttpHandler { Proxy = proxy, UseProxy = true, }
);

var bot = new TelegramBotClient("YOUR_API_TOKEN", httpClient);
SOCKS5 Proxy over Tor
Warning: Use for Testing only!
Do not use this method in a production environment as it has high network latency and poor bandwidth.
Using Tor, a developer can avoid network restrictions while debugging and testing the code before a production release.
-
Install Tor Browser
-
Open the
torccfile with a text editor (Found inTor Browser\Browser\TorBrowser\Data\Tor) -
Add the following lines: (configurations are described below)
EntryNodes {NL} ExitNodes {NL} StrictNodes 1 SocksPort 127.0.0.1:9050 -
Look at the Socks5 proxy example above.
-
Start the Tor Browser
Usage:
// using System.Net;
// using System.Net.Http;

WebProxy proxy = new ("socks5://127.0.0.1:9050");

HttpClient httpClient = new (
    new SocketsHttpHandler { Proxy = proxy, UseProxy = true }
);

var bot = new TelegramBotClient("YOUR_API_TOKEN", httpClient);
Note that Tor has to be active at all times for the bot to work.
Configurations in torcc
EntryNodes {NL}
ExitNodes {NL}
StrictNodes 1
These three lines make sure you use nodes from the Netherlands as much as possible to reduce latency.
SocksPort 127.0.0.1:9050
This line tells tor to listen on port 9050 for any socks connections. You can change the port to anything you want (9050 is just the default), only make sure to use the same port in your code.
Business Bot Features
![]()
Several business features have been added for premium users to Telegram.
In particular, premium users can now select a bot to act as a chatbot on their behalf, in order to manage/reply to messages from other users (typically, their business customers).
BotFather configuration
First, the bot owner need to talk to @BotFather and go to the Bot Settings to enable Business Mode
In the following sections, we will refer to the premium user using your chatbot as “the business owner”.
BusinessConnection update
Once your chatbot is configured, the business owner has to go to their account settings, under Telegram Business > Chatbots and type your bot username.
At this point, your bot will receive an update.BusinessConnection which contains:
- a unique id (you may want to store this)
- details on the User (business owner)
- IsEnabled (false if the business connection got cancelled)
- CanReply (if the bot can act on behalf of that user in chats that were active in the last 24 hours)
You can retrieve these info again later using GetBusinessConnection(id)
BusinessMessage updates
From now on, your bot will receive updates regarding private messages between users (customers) and the business owner:
update.BusinessMessage: a customer sent a new message to the business ownerupdate.EditedBusinessMessage: a customer modified one of its message sent to the business ownerupdate.DeletedBusinessMessages: a customer deleted some messages in private with the business owner
In these messages/updates, the field BusinessConnectionId will tell you which BusinessConnection this applies to
(useful for context if your chatbot is used by several business owners)
Acting on behalf of the business owner
If the business owner enabled “Reply to message” during the initial business connection, your bot can reply or do some other actions on behalf of their user account.
To do so, you can call many Bot API methods with the optional businessConnectionId: parameter.
This way your bot can send/edit/pin messages, send chat actions (like “typing”), manage polls/live location, as if you were the business owner user.
Some notes about messages sent on behalf of the business owner:
- They will NOT be marked with your bot name from the customer point of view
- They will be marked with your bot name in the business owner private chat (a banner also appears on top of the chat)
- These features are limited to private chats initiated by customers talking to the business owner.
Bot Payments API & Telegram Stars
![]()
![]()
Telegram offers a safe, simple and unified payment system for goods and services.
Due to Google/Apple policies, there is a distinction between:
- Digital Goods & Services, which can be paid using Telegram Stars (XTR) only
- Physical Goods, which can be paid using regular currencies, and can request more details like a shipping address.
Both process are similar, so we will demonstrate how to do a Telegram Stars payment (simpler) and give you some info about the difference for Physical Goods.
Important notes for physical goods
Before starting, you need to talk to @BotFather, select one of the supported Payment providers (you need to open an account on the provider website), and complete the connection procedure linking your bot with your provider account.
It is recommended to start with the Stripe TEST MODE provider so you can test your bot with fake card numbers before going live.
Price amounts are expressed as integers with some digits at the end for the “decimal” part.
For example, in USD currency there are 2 digits for cents, so 12345 means $123.45 ; With Telegram Stars (XTR), there are no extra digits.
See “exp” in this table, to determine the number of decimal digits for each currency.
Sending an invoice
![]()
When your bot is ready to issue a payment for the user to complete, it will send an invoice:
await bot.SendInvoice(
    chatId: chatId,                         // same as userId for private chat
    title: "Product Title",
    description: "Product Detailed Description",
    payload: "InternalProductID",           // not sent nor shown to user
    currency: "XTR",                        // 3-letters ISO 4217 currency
    prices: [("Price", 500)],               // only one price for XTR
    photoUrl: "https://cdn.pixabay.com/photo/2012/10/26/03/16/painting-63186_1280.jpg"
);
Alternatively, you can instead generate an URL for that payment with CreateInvoiceLink,
or if your bot supports Inline Mode, you can send invoices as inline results (“via YourBot”).
With Physical Goods, you can specify more parameters like:
- the
providerTokenobtained by BotFather (something like “1234567:TEST:aBcDeFgHi”) - several price lines detailing the total price
- some suggested tips
- the need for extra information about the user, including a shipping address
- if the price is flexible depending on the shipping address/method
Handling the ShippingQuery Update
![]()
![]()
This update is received only for Physical Goods, if you specified a flexible price. Otherwise you can skip to the next section.
update.ShippingQuery would contain information like the current shipping address for the user, and can be received again if the user changes the address.
You should check if the address is supported, and reply using bot.AnswerShippingQuery with an error message or a list of shipping options with associated additional price lines:
var shippingOptions = new List<ShippingOption>();
shippingOptions.Add(new() { Title = "DHL Express", Id = "dhl-express",
    Prices = [("Shipping", 1200)] });
shippingOptions.Add(new() { Title = "FedEx Fragile", Id = "fedex-fragile",
    Prices = [("Packaging", 500), ("Shipping", 1800)] });
await bot.AnswerShippingQuery(shippingQuery.Id, shippingOptions);
Handling the PreCheckoutQuery Update
![]()
![]()
This update is received when the user has entered their payment information and confirmed the final Pay button.
update.PreCheckoutQuery contains all the requested information for the order, so you can validate that all is fine before actual payment
You must reply within 10 seconds with:
if (confirm)
    await bot.AnswerPreCheckoutQuery(preCheckoutQuery.Id); // success
else
    await bot.AnswerPreCheckoutQuery(preCheckoutQuery.Id, "Can't process your order: <REASON>");
Handling the SuccessfulPayment Message
![]()
If you confirmed the order in the step above, Telegram requests the payment with the payment provider.
If the payment is successfully processed, you will receive a private Message of type SuccessfulPayment from the user, and you must then proceed with delivering the goods or services to the user.
The message.SuccessfulPayment structure contains all the same previous information, plus two payment identifiers from Telegram and from the Payment Provider.
You should store these ChargeId strings for traceability of the transaction in case of dispute, or refund (possible with RefundStarPayment).
Full example code for Telegram Stars transaction
using Telegram.Bot;
using Telegram.Bot.Types;

var bot = new TelegramBotClient("YOUR_BOT_TOKEN");
bot.OnUpdate += OnUpdate;
Console.ReadKey();

async Task OnUpdate(Update update)
{
   switch (update)
   {
      case { Message.Text: "/start" }:
         await bot.SendInvoice(update.Message.Chat,
            "Unlock feature X", "Will give you access to feature X of this bot", "unlock_X",
            "XTR", [("Price", 200)], photoUrl: "https://cdn-icons-png.flaticon.com/512/891/891386.png");
         break;
      case { PreCheckoutQuery: { } preCheckoutQuery }:
         if (preCheckoutQuery is { InvoicePayload: "unlock_X", Currency: "XTR", TotalAmount: 200 })
            await bot.AnswerPreCheckoutQuery(preCheckoutQuery.Id); // success
         else
            await bot.AnswerPreCheckoutQuery(preCheckoutQuery.Id, "Invalid order");
         break;
      case { Message.SuccessfulPayment: { } successfulPayment }:
         System.IO.File.AppendAllText("payments.log", $"{DateTime.Now}: " +
            $"User {update.Message.From} paid for {successfulPayment.InvoicePayload}: " +
            $"{successfulPayment.TelegramPaymentChargeId} {successfulPayment.ProviderPaymentChargeId}\n");
         if (successfulPayment.InvoicePayload is "unlock_X")
            await bot.SendMessage(update.Message.Chat, "Thank you! Feature X is unlocked");
         break;
   };
}
Telegram Mini Apps
![]()
If standard Telegram Bot features aren’t enough to fit your needs, you may want to consider building a Mini App instead.
This take the form of an integrated browser window showing directly web pages from your bot WebApp, so you have more control with HTML/JS to display the interface you like.
Check our full example project based on Razor pages, and including a clone of the above @DurgerKingBot and more demo to test features.
Starting Mini-Apps
Mini Apps can be launched from various ways:
- Keyboard Buttons:
new KeyboardButton(.., "https://..") - Inline Buttons:
new InlineKeyboardButton(.., InlineButtonType.WebApp, "https://..") - Open App button: configured via @BotFather > Bot Settings > Configure Mini App
- Chat menu buton (left of user textbox): configured via
SetChatMenuButton - Inline-mode results with a “Switch to Mini App” button:
AnswerInlineQuerywith parameterInlineQueryResultsButton.WebApp - Direct link like https://t.me/botusername/appname?startapp=command
Integration
Your web pages must include this script in the <head> part:
<script src="https://telegram.org/js/telegram-web-app.js"></script>
Your Javascript can then access a Telegram.WebApp object supporting many properties and methods, as well as event handlers.
In particular, you may want to use your Telegram.Bot backend to validate the authenticity of Telegram.WebApp.initData.
This can be done using our AuthHelpers.ParseValidateData method and the bot token, to make sure the requests come from Telegram and obtain information about Telegram user and context.
For more details
To read more about Mini Apps, see https://core.telegram.org/bots/webapps
Visit our example project: https://github.com/TelegramBots/Telegram.Bot.Examples/tree/master/MiniApp
Telegram Passport
![]()
![]()
![]()
Telegram Passport is a unified authorization method for services that require personal identification.
As a bot developer, you can use it to receive confidential user data in an end-to-end encrypted fashion.
There are several Know Your Customer (KYC) solutions that have already added support for Telegram Passport.
This guide is targeted at bot developers and presents our library support for Telegram Passport. Click the badges above for more documentation.
Quickstart
This guide teaches the basics of working with Telegram Passport. See the complete version of the code at Quickstart project. Code snippets on this page are in the context of that project.
Encryption Keys
You don’t really need to generate any RSA key. Use our sample keys for this demo.
Send the public key to @BotFather using /setpublickey command:
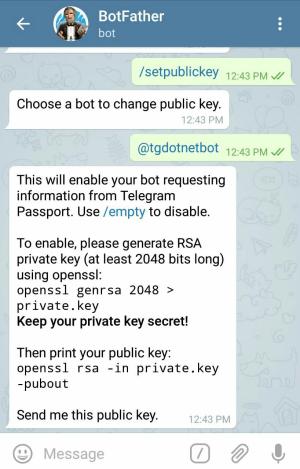
Copy this public key and send it to BotFather.
-----BEGIN PUBLIC KEY-----
MIIBIjANBgkqhkiG9w0BAQEFAAOCAQ8AMIIBCgKCAQEA0VElWoQA2SK1csG2/sY/
wlssO1bjXRx+t+JlIgS6jLPCefyCAcZBv7ElcSPJQIPEXNwN2XdnTc2wEIjZ8bTg
BlBqXppj471bJeX8Mi2uAxAqOUDuvGuqth+mq7DMqol3MNH5P9FO6li7nZxI1FX3
9u2r/4H4PXRiWx13gsVQRL6Clq2jcXFHc9CvNaCQEJX95jgQFAybal216EwlnnVV
giT/TNsfFjW41XJZsHUny9k+dAfyPzqAk54cgrvjgAHJayDWjapq90Fm/+e/DVQ6
BHGkV0POQMkkBrvvhAIQu222j+03frm9b2yZrhX/qS01lyjW4VaQytGV0wlewV6B
FwIDAQAB
-----END PUBLIC KEY-----
Now Telegram client app can encrypt the data for your bot using this key.
Request Information
Bot waits for a text message from user. Once it receives a text message, it generates an authorization request link and sends that to the user.
Authorization Request
![]()
A passport authorization request means that the bot should ask the user to open a tg://resolve URI in the browser
with specific parameters in its query string.
You can alternatively have a button in an HTML page on your website for that.
Type AuthorizationRequestParameters helps you in creating such an URI.
AuthorizationRequestParameters authReq = new AuthorizationRequestParameters(
    botId: 123456, // bot user ID
    publicKey: "...", // public key in PEM format. same as the key above.
    nonce: "unique nonce for this request",
    scope: new PassportScope { // a PassportScope object
        Data = [
            new PassportScopeElementOne(EncryptedPassportElementType.Address),
            new PassportScopeElementOne(EncryptedPassportElementType.PhoneNumber)
        ]
    });
In SendAuthorizationRequestAsync method, we ask for address and phone_number scopes.
Then, we generate the query string and ask user to open the link.
You might be wondering what is the magic in here?
Our webpage https://telegrambots.github.io/Telegram.Bot.Extensions.Passport/redirect.html
redirects the user to tg://resolve URI, appending whatever query string was passed to it.
If a user is using an Android device, the URI will start with
tg:instead of the defaulttg://.
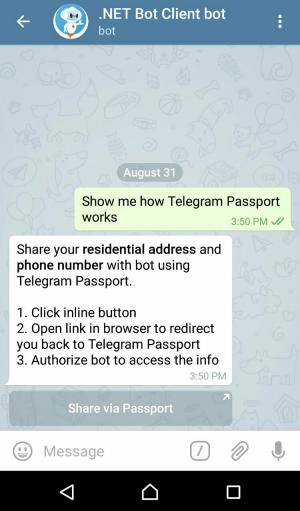
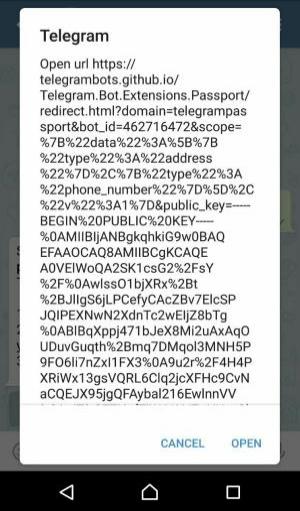
Passport Data
You, the user, should now be redirected to the Telegram Passport screen in your Telegram client app. Enter your password and log in.
Note that the app will ask you to register if this is the first time you are using Telegram Passport.
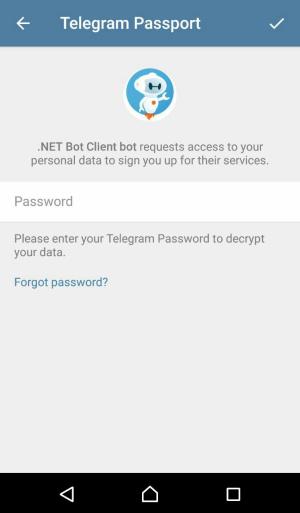
Fill in the address and phone number data. Click on the Authorize button at the end.
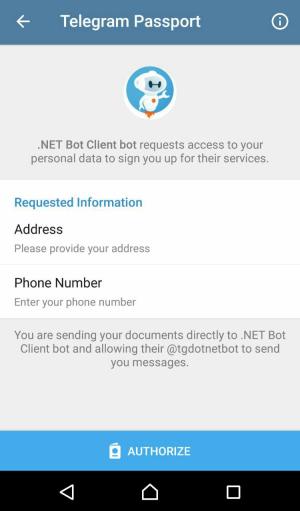

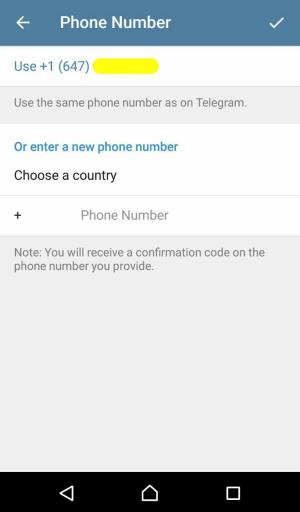
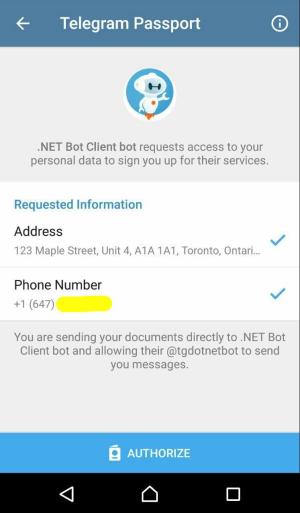
At this point, your Telegram client app encrypts the actual Telegram Passport data (e.g. address) using the AES algorithm, and then encrypts the info required for decryption using your bot’s public RSA key. Finally, it sends the result of both encryptions to Telegram servers.
Data Decryption
![]()
Your bot now receives a new message update with the encrypted Passport data. The user is also notified in the chat:
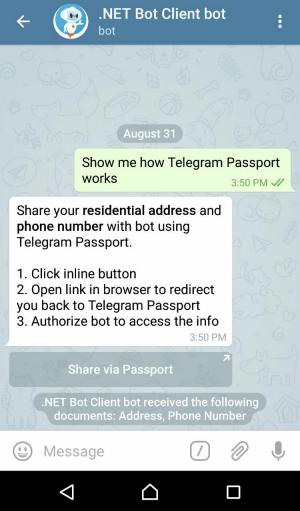
Let’s decrypt that gibberish to get the information. That’s what DecryptPassportDataAsync method does.
Step 1: Credentials
![]()
![]()
You can’t just access the encrypted data in the message.PassportData.Data array.
Required parameters for their decryption are in the message.PassportData.Credentials object.
But that credentials object is encrypted using bot’s public key!
We first take the bot’s private key this time and decrypt the credentials.
Note: We are loading the RSA key from PEM format thanks to the method
RSA.ImportFromPem(.NET 5+).
var decrypter = new Decrypter();
var credentials = decrypter.DecryptCredentials(message.PassportData.Credentials, GetRsaPrivateKey());
Step 2: Nonce
![]()
![]()
There is a nonce property on the credentials (now decrypted) object.
In order to prevent certain attacks, ensure its value is exactly the same as the nonce you set in the authorization request.
Read more about nonce on Wikipedia.
Step 3: Residential Address
![]()
![]()
![]()
![]()
![]()
It’s finally time to see the user’s address.
We are looking for an encrypted element with type of address in message.PassportData.Data array.
Also, decryption parameters for that are in Credentials.SecureData.Address.Data.
Here is how the decryption magic happens:
var addressElement = message.PassportData.Data.Single(el => el.Type == PassportEnums.Scope.Address);
var address = decrypter.DecryptData<ResidentialAddress>(addressElement.Data, credentials.SecureData.Address.Data);
DecryptData method does 3 tasks here:
- Decrypts the data into a JSON-serialized string
- Verifies that the data hashes match
- Converts from JSON to a .NET object
Step 4: Phone Number
![]()
Values for phone number and email address are not end-to-end encrypted in Telegram Passport and Telegram stores these values after being verified.
There is no need for decryption at this point.
Just find the element with the type of phone_number in the message.PassportData.Data array.
Information Demo
At the end, bot sends some of the information received to the user for demo purposes.
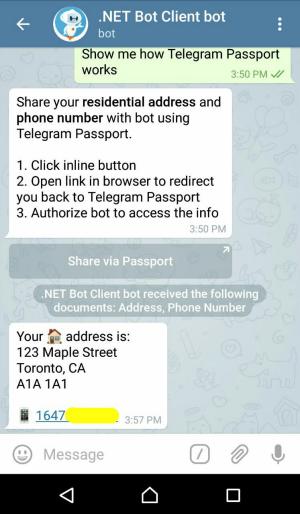
Passport Files and Documents
![]()
We use the driver’s license scope here to show decryption of ID document data and passport files for front side scan, reverse side scan, selfie photo, and translation scan. That should cover most of the field types in Telegram Passport.
Sections below are referring to the test methods in Driver’s License Scope Tests collection. Here are the steps:
- Authorization Request
- Driver’s License Info
- Passport Message
- Credentials
- ID Document Data
- Passport File
Authorization Request
![]()
![]()
![]()
We start by generating an authorization URI. Since a driver’s license is considered as a proof of identity, we ask for optional data selfie with document and translation document scan as well.
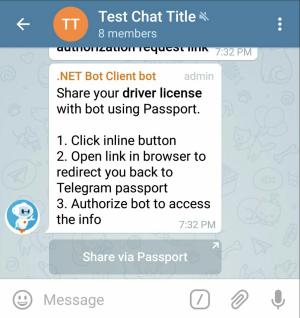
Driver’s License Info
As a user, provide information for the required fields: front side, reverse side, and document number. Also, test methods here expect a selfie photo and a file for translation scan.


Click the Authorize button at the end.
Passport Message
![]()
![]()
This test method checks for a Passport message with a driver’s license element on it.
Credentials
![]()
![]()
![]()
We decrypt credentials using the RSA private key and verify that the same nonce is used.
RSA key = EncryptionKey.ReadAsRsa();
var decrypter = new Decrypter();
var credentials = decrypter.DecryptCredentials(passportData.Credentials, key);
bool isSameNonce = credentials.Nonce == "Test nonce for driver's license";
ID Document Data
![]()
![]()
In our test case, there is only 1 item in the message.PassportData.Data array and that’s the encrypted element for
the driver’s license scope.
We can get information such as document number and expiry date for the license from that element:
IdDocumentData licenseDoc = decrypter.DecryptData<IdDocumentData>(
    encryptedData: element.Data,
    dataCredentials: credentials.SecureData.DriverLicense.Data
);
Passport File
![]()
![]()
Passport file is an encrypted JPEG file on Telegram servers. You need to download the passport file and decrypt it using its accompanying file credentials to see the actual JPEG file content. In this section we try to demonstrate different use cases that you might have for such files.
No matter the method used, the underlying decryption logic is the same.
It really comes down to your decision on working with streams vs. byte arrays.
Decrypter gives you both options.
Front Side File
![]()
A pretty handy extension method is used here to stream writing the front side file to disk.
Method DownloadAndDecryptPassportFileAsync does a few things:
- Makes an HTTP request to fetch the encrypted file’s info using its passport file_id
- Makes an HTTP request to download the encrypted file using its file_path
- Decrypts the encrypted file
- Writes the actual content to the destination stream
TGFile encryptedFileInfo;
using (System.IO.Stream stream = System.IO.File.OpenWrite("/path/to/front-side.jpg"))
{
    encryptedFileInfo = await bot.DownloadAndDecryptPassportFileAsync(
        element.FrontSide, // PassportFile object for front side
        credentials.SecureData.DriverLicense.FrontSide, // front side FileCredentials
        stream // destination stream for writing the JPEG content to
    );
}
Warning
This method is convenient to use but gives you the least amount of control over the operations.
Reverse Side File
![]()
Previous method call is divided into two operations here for reverse side of the license. Streams are used here as well.
File encryptedFileInfo;
using (System.IO.Stream
    encryptedContent = new System.IO.MemoryStream(element.ReverseSide.FileSize),
    decryptedFile = System.IO.File.OpenWrite("/path/to/reverse-side.jpg")
) {
    // fetch the encrypted file info and download it to memory
    encryptedFileInfo = await bot.GetInfoAndDownloadFile(
        element.ReverseSide.FileId, // file_id of passport file for reverse side
        encryptedContent // stream to copy the encrypted file into
    );
    // ensure memory stream is at the beginning before reading from it
    encryptedContent.Position = 0;

    // decrypt the file and write it to disk
    await decrypter.DecryptFileAsync(
        encryptedContent,
        credentials.SecureData.DriverLicense.ReverseSide, // reverse side FileCredentials
        decryptedFile // destination stream for writing the JPEG content to
    );
}
Selfie File
![]()
We deal with selfie photo as a byte array. This is essentially the same operation as done above via streams. We also post the selfie photo to a chat.
// fetch the info of the passport file(selfie) residing on Telegram servers
TGFile encryptedFileInfo = await bot.GetFile(element.Selfie.FileId);

// download the encrypted file and get its bytes
byte[] encryptedContent;
using (System.IO.MemoryStream
    stream = new System.IO.MemoryStream(encryptedFileInfo.FileSize)
)
{
    await bot.DownloadFile(encryptedFileInfo, stream);
    encryptedContent = stream.ToArray();
}

// decrypt the content and get bytes of the actual selfie photo
byte[] selfieContent = decrypter.DecryptFile(
    encryptedContent,
    credentials.SecureData.DriverLicense.Selfie
);

// send the photo to a chat
using (System.IO.Stream stream = new System.IO.MemoryStream(selfieContent)) {
    await bot.SendPhoto(
        123456,
        stream,
        "selfie with driver's license"
    );
}
Translation File
![]()
A bot can request certified English translations of a document. Translations are also encrypted passport files so their decryption is no different from others passport files.
Assuming that the user sends one translation scan only for the license, we receive the translation passport file object in
message.PassportData.Data[0].Translation[0] and its accompanying file credentials object in
credentials.SecureData.DriverLicense.Translation[0].
File gets written to disk as a byte array.
PassportFile passportFile = element.Translation[0];
FileCredentials fileCreds = credentials.SecureData.DriverLicense.Translation[0];

// fetch passport file info
TGFile encryptedFileInfo = await bot.GetFile(passportFile.FileId);

// download encrypted file and get its bytes
byte[] encryptedContent;
using (System.IO.MemoryStream
    stream = new System.IO.MemoryStream(encryptedFileInfo.FileSize)
)
{
    await bot.DownloadFile(encryptedFileInfo, stream);
    encryptedContent = stream.ToArray();
}

// decrypt the content and get bytes of the actual selfie photo
byte[] content = decrypter.DecryptFile(
    encryptedContent,
    fileCreds
);

// write the file to disk
await System.IO.File.WriteAllBytesAsync("/path/to/translation.jpg", content);
Handling Passport errors
Handling Data Errors
![]()
If the passport data you received contains errors, the bot can use the SetPassportDataErrors method to inform the user and request information again. The user will not be able to resend the data, until all errors are fixed.
Here is an example call using decrypted credentials:
//using Telegram.Bot.Types.Passport;

PassportElementError[] errors =
{
    new PassportElementErrorDataField
    {
        Type = EncryptedPassportElementType.Passport,
        FieldName = "document_no",
        DataHash = credentials.SecureData.Passport.Data.DataHash,
        Message = "Invalid passport number"
    },
    new PassportElementErrorFrontSide
    {
        Type = EncryptedPassportElementType.Passport,
        FileHash = credentials.SecureData.Passport.FrontSide.FileHash,
        Message = "Document scan is redacted"
    },
    new PassportElementErrorSelfie
    {
        Type = EncryptedPassportElementType.Passport,
        FileHash = credentials.SecureData.Passport.Selfie.FileHash,
        Message = "Take a selfie without glasses"
    },
    new PassportElementErrorTranslationFile
    {
        Type = EncryptedPassportElementType.Passport,
        FileHash = credentials.SecureData.Passport.Translation[0].FileHash,
        Message = "Document photo is blury"
    },
};

await bot.SetPassportDataErrors(passportMessage.From.Id, errors);
Decryption error (PassportDataDecryptionException)
Methods on Decrypter might throw PassportDataDecryptionException exception if an error happens during decryption.
The exception message tells you what went wrong but there is not much you can do to resolve it.
Maybe let your user know the issue and ask for Passport data again.
It is important to pass each piece of encrypted data, e.g. Id Document, Passport File, etc., with the right accompanying credentials to decryption methods.
Spot the problem in this code decrypting driver’s license files:
byte[] selfieContent = decrypter.DecryptFile(
    encSelfieContent, // byte array of encrypted selfie file
    credentials.SecureData.DriverLicense.FrontSide // WRONG! use selfie file credentials
);
// throws PassportDataDecryptionException: "Data hash mismatch at position 123."
Frequently Asked Questions
I recommend you read all of these as you will learn many interesting things. Or you can use Ctrl-F to search for a specific topic.
- 1. Can you give me documentation/examples links?
- 2. My update handler fails or stops executing at some point
- 3. Apparently my update handler gets a_
NullReferenceException - 4. How to add buttons under a message?
- 5. How to handle a click on such inline buttons?
- 6. How to show a popup text to the user?
- 7. How to fill the input textbox of the user with some text?
- 8. How to fetch previous messages?
- 9. How to fetch a list of all users in chat?
- 10. How to send a private message to some random user?
- 11. How to detect if a user blocked my bot?
- 12. How to set a caption and ReplyMarkup to a media group (album)?
- 13. How to write a bot that make questions/answers with users?
- 14. How to make font effects in message?
- 15. Where can I host my bot online for cheap/free?
- 16. Is there some limitation/maximum about feature X?
- 17. How to populate the bot Menu button / commands list?
- 18. How to receive
ChatMemberupdates? - 19. How to get rid of past updates when I restart my bot?
- 20. Difficulties to upload & send a file/media?
- 21. How to fetch all medias from an album/media group ?
- 22. How to send a custom emoji❓
- 23. How to change button/text color or background?
- 24. Can I use several apps/instance to manage my bot?
- 25. How do I get the user id from a username?
- 26. How to receive messages from channels?
- 27. How to send the same media multiple times
- This FAQ doesn’t have my question on it
1. Can you give me documentation/examples links?
- Here is the main documentation website.
- You can find more bot example projects here
- Search the official API documentation and official bots FAQ.
- check tooltips in your IDE, or navigate with F12 on API methods and read/expand comments.
If you’re C# beginner, you should learn about async programming.
2. My update handler fails or stops executing at some point
You likely have an exception somewhere. You should place a try..catch around your whole update handler.
Also, you should learn to use a debugger and go step-by-step through your code to understand where and why an exception is raised. See next question.
3. Apparently my update handler gets a NullReferenceException
Not all updates are about an incoming Message, so update.Message could be null. (see also update.Type)
Not all messages are text messages, message.Text could be null (see also message.Type). etc…
So please use a debugger to check the content of your variables or structure fields and make sure your code can handle all cases.
4. How to add buttons under a message?
Pass an InlineKeyboardMarkup into the replyMarkup parameter when sending the message. You will likely need to create a List<List<InlineKeyboardButton>> for rows&columns
See also next question.
5. How to handle a click on such inline buttons?
For buttons with callback data, your update handler should handle update.CallbackQuery.
(Remember that not all updates are about update.Message. See question #3)
Your code should answer to the query within 10 seconds, using AnswerCallbackQuery (or else the button gets momentarily disabled)
6. How to show a popup text to the user?
It is only possible with inline callback button (see above questions).
Use AnswerCallbackQuery with some text, and pass parameter showAlert: true to display the text as an alert box instead of a short popup.
7. How to fill the input textbox of the user with some text?
There is not a simple direct method for this, but here is what you can try:
- With a Public username link:
t.me/username?text=Hello+World
(works only if target is a user/bot and not the current chat) - With a Share link:
tg://msg_url?url=https://example.com&text=Hello+World
(user must select a target first) - With a Bot deep link:
t.me/botusername?start=param
(param is limited to base64 characters, bot will receive/start param) - With a ReplyKeyboardMarkup: buttons under the textbox to send pre-made texts
- With an Inline Mode bot and
SwitchInlineQueryinline buttons, you can make the user pre-type the name of your bot followed by some query
8. How to fetch previous messages?
You can’t with Bot API but it’s possible with WTelegramBot.
Normally, bots only get messages at the moment they are posted. You could archive them all in a database for later retrieval.
9. How to fetch a list of all users in chat?
You can’t with Bot API but it’s possible with WTelegramBot.
Normally, bots can only get the list of admins (GetChatAdministrators) or detail about one specific member (GetChatMember)
Alternatively, you can keep track of users by observing new messages in a chat and saving user info into a database.
10. How to send a private message to some random user?
You can’t. Bots can only send private messages to users that have already initiated a private chat with your bot.
11. How to detect if a user blocked my bot?
You would have received an update.MyChatMember with NewChatMember.Status == ChatMemberStatus.Kicked
If you didn’t record that info, you can try to SendChatAction and see if it raises an exception.
12. How to set a caption and ReplyMarkup to a media group (album)?
Set the media.Caption (and media.ParseMode) on the first or last media
Media groups can’t have Reply Markup unfortunately.
13. How to write a bot that make questions/answers with users?
Either you can code a complex state machine workflow, saving where each user is currently in the discussion tree.
Or you can just use YourEasyBot which makes sequential bots very simple to write… (or one of the other frameworks available for Telegram.Bot)
14. How to make font effects in message?
Pass a ParseMode.Html (or ParseMode.MarkDownV2) to argument parseMode. See formatting options.
⚠️ I highly recommend you choose HTML formatting because MarkDownV2 has A LOT of annoyingly reserved characters and you will regret it later.
15. Where can I host my bot online for cheap/free?
I would recommend you make an ASP.NET webhook bot and host it on some WebApp hosting service.
For example, Azure WebApp Service has a F1 Free plan including 1 GB disk, 1 GB ram, 60 minutes of daily cumulated active CPU usage (more than enough for most bots without heavy use). And publishing to Azure is very easy from VS.
A credit-card is necessary but you shouldn’t get charged if you stay within quotas.
Other cloud providers might also offer similar services.
16. Is there some limitation/maximum about feature X?
See https://limits.tginfo.me for a list of limitations.
17. How to populate the bot Menu button / commands list?
You can either do this via @BotFather (static entries), or you can use SetMyCommands for more advanced settings
⚠️ This menu can only be filled with bot commands, starting with a / and containing only latin characters a-z_0-9
18. How to receive ChatMember updates?
You should specify all update types including ChatMember in AllowedUpdates array on StartReceiving:ReceiverOptions or SetWebhook
More details here
19. How to get rid of past updates when I restart my bot?
Pass true into StartReceiving:ReceiverOptions:DropPendingUpdates or SetWebhook:dropPendingUpdates
Alternatively, you can call await bot.DropPendingUpdates() before polling or using bot.OnUpdate.
20. Difficulties to upload & send a file/media?
- Make sure you
awaituntil the end of the send method before closing the file (a “using” clause would close the file on leaving the current { scope } - If you just filled a
MemoryStream, make sure to rewind it to the beginning withms.Position = 0;before sending - If you send a media group, make sure you specify different filenames on
InputFile.FromStream
21. How to fetch all medias from an album/media group ?
When receiving a media group, you need to collect the series of separate messages in a chat having the same MediaGroupId property.
There is no way to know how many medias/messages the album is composed of.
Read more here
22. How to send a custom emoji❓
There are 3 solutions for a bot to send custom emojis (or use on buttons):
- If the bot owner has Telegram Premium, the bot can send custom emojis in private and in groups
- To send custom emojis anywhere, you need to buy a username on Fragment, and assign it to your bot (via an additional upgrade fee of 1K TON, ~$2,000)
- To send custom emojis in a specific group, you can also have premium members boost your group to level 4. You can then assign a custom emoji pack to your group that your members AND bots can use freely in group messages.
To write custom emojis in your bot message, use specific HTML or Markdown syntax (or entity).
To find the IDs of custom emojis, send or forward a message to @JsonDumpBot
23. How to change button/text color or background?
It’s not possible to change the colors of text. Only links and code monospace may appear differently depending on the client.
You can however use one of 3 colors for buttons by changing the Style property during construction: new InlineKeyboardButton("Green button", "dataOrUrl") { Style = KeyboardButtonStyle.Success }
24. Can I use several apps/instance to manage my bot?
You can call API methods (like sending messages) from several instances in parallel
BUT only one instance can call method GetUpdates (or else you will receive Telegram API Error 409: Conflict: terminated by other getUpdates request)
To process the updates in parallel, read this section of our documentation.
25. How do I get the user id from a username?
You can’t with Bot API but it’s possible with WTelegramBot.
Alternatively, you could store in database the mapping of UserId<->Username.
Remember that not every user has a username, and it can be changed.
Also, your bot still won’t be able to contact a user first.
26. How to receive messages from channels?
Your bot has to be added as administrator of the channel.
You will then receive the messages as update.ChannelPost or update.EditedChannelPost.
27. How to send the same media multiple times
The first time, you will send the media with a stream (upload). Next times, you will use its FileId:
var msg = await bot.SendVideo(chatId, stream, ....);
var fileId = msg.Video.FileId

// next times:
await bot.SendVideo(chatId2, fileId, ...);
For photos, use msg.Photo[^1].FileId
This FAQ doesn’t have my question on it
Feel free to join our Telegram group and ask your question there
Migration guides to newer versions of the library
- Migrate to v22.*
- Migrate to v21.*
- Migrate to v19.*
- Migrate to v18.*
- Migrate to v17.*
- Migrate to v14.*
Migration guide for version 22.x
If you’re migrating from version 19.x, you might want to read our migration doc for v21 first. There were lots of interesting changes in versions v21.x.
We are back on Nuget.org!
And our old nuget feed nuget.voids.site is no more, so please remove this line from your nuget.config file, or from your IDE settings (Package sources)
⚠️ Breaking changes
We removed the Async suffix from our API method names, and renamed SendTextMessageAsync to SendMessage.
This was done to match official API documentation and because all our TelegramBotClient methods are asynchronous (no real need to differenciate between async or non-async methods)
We also reordered a few optional parameters to move away the lesser used arguments later down the argument list (typically: message_thread_id/entities)
and move the more useful arguments up closer to the beginning (typically: replyParameters/replyMarkup)
This should make your life simpler as you won’t need to resort to named arguments for the most commonly used method parameters.
Finally, we renamed property Message.MessageId as just Message.Id. (but MessageId will remain supported)
Note
All the previous names are still supported at the moment, so your code should just run fine with version 22.0, except you will get warnings about “Obsolete” code while compiling.
📝 How to adapt your code for these changes
In order to port your code easily and get rid of compiler warnings, I suggest you use these 4 Find and Replace operations in your IDE
So start by opening the Edit > Find and Replace > Replace in Files panel (Ctrl+Shift+H)
Untick the checkboxes: Match case and Match whole word
Tick the checkbox: ✓ Use regular expressions
Select the scope to look in: Current project or Entire solution
(In the following, we suppose your TelegramBotClient variable is named bot, please modify the expressions if necessary)
-
To remove explicit null arguments for messageThreadId/entities
Replace:(bot\.Send\w+Async\b.*,) null,
With:$1
🖱️Click on Replace All
🖱️Click on Replace All again -
To rename SendTextMessageAsync with SendMessage
Replace:\.SendTextMessageAsync\b
With:.SendMessage
🖱️Click on Replace All -
To remove the Async suffixes:
Replace:(bot\.\w+)Async\b
With:$1
🖱️Click on Replace All -
To rename the MessageId property:
Replace:(message)\.MessageId\b
With:$1.Id
🖱️Click on Replace All
(Depending on your variable naming convention, you might want to repeat that, replacing(message)with(msg)or something else)
The remaining effort to make your code compile should now be much reduced.
(maybe a few more parameter reordering if you didn’t use named parameters)
Addendum: we also renamed method MakeRequestAsync to SendRequest
(if you use this non-recommended method)
What’s new in version 22.0
- Support for Bot API 7.11
- Implicit conversions for single-field structures
For example classes containing just one string (like BotDescription, WebAppInfo or CopyTextButton) can be handled just as a string - Implicit conversion from FileBase classes to InputFile
This means you can pass an object like aVideoorPhotoSizedirectly as argument to a Send method and it will use its FileId - Helper method
GetFileIdType
It can tell you which type of object/media is referenced by a FileId string - Huge rewrite of our serialization code to make it more performant and straightforward.
- Updated System.Text.Json due to vulnerability CVE-2024-43485
What’s new in version 22.1
- Support for Bot API 8.0
- new helper
message.MessageLink()to get the t.me link to that message (Supergroup and Channel only) ToHtml/ToMarkdown: support for ExpandableBlockquote (v22.1.1)- fix savePreparedInlineMessage request (v22.1.2)
TransactionPartnerUser.Gifttype was corrected in Bot API (v22.1.3)
What’s new in version 22.2
- Support for Bot API 8.1
- Support for Native AOT / Blazor / Trimming
(this is still experimental and we would enjoy your feedback if you try to use the library in such contexts)
What’s new in version 22.3
- Support for Bot API 8.2
- Renamed class
Telegram.Bot.Types.FileasTGFile
(the nameFilewas annoyingly conflicting with the often-usedSystem.IO.Fileclass) - Added property
TokentoTelegramBotClient
(you can use it toParseValidateDataMiniApp requests, authenticate WebHook updates, …)
What’s new in version 22.4
- Support for Bot API 8.3
- Added helpers
ChatMember.IsInChatandChatMember.IsAdmin - Added constructor
ChatPermissions(bool)to set all fields to true or false - Fix a potential issue in
.ToHtml()escaping&in URLs - Renamed helper classes
EmojitoDiceEmojiandKnownReactionTypeEmojitoReactionEmoji - Changed
IReplyMarkupto abstract classReplyMarkupso you can directly pass text, button or arrays of buttons for thereplyMarkup:parameter BotCommandcan also now be implicitly constructed from a(string command, string description)tuple or new explicit constructor (v22.4.3)
Example:await Bot.SetMyCommands([("/start", "Start the bot"), ("/privacy", "Privacy policy")]);- Added helper
DownloadFile(TGFile file, ...)(v22.4.4)
What’s new in version 22.5
- Support for Bot API 9.0
- Removed the
*Async-suffixed versions of the methods that were marked [Obsolete] since v22.0.
→ Follow the steps at the top of this page to adapt your existing code if you haven’t already. Services.ConfigureTelegramBot*is no longer necessary to make your Webhook bot compatible with Telegram updates!
→ We’ve made the library structures compatible with the default JsonCamelCaseNamingPolicy used by ASP.NET Core projects.
In some rare cases (like Native AOT / Blazor / Trimming), this call might still be necessary.- Removed dependency on ASP.NET Core (Microsoft.AspNetCore.App) from the main library, by moving the
ConfigureTelegramBotMvc()method to a separate package Telegram.Bot.AspNetCore
→ That dependency caused some issues for users deploying to Docker / Android / WebAssembly
→ As explained above, you shouldn’t need this method anymore in most cases, but if you do, you can add the nuget package Telegram.Bot.AspNetCore to your project - Merged the Telegram.Bot.Extensions.Passport package into the main library
→ It was old and unmaintained, but now its methods and structures supporting Telegram Passport are up-to-date and available directly in Telegram.Bot - New
HtmlTexthelpers method:ToPlain,PlainLengthandTruncateto get the plain text only from HTML text (remove the <tags>), the number of plain text characters, or truncate the HTML to a number of plain text characters (useful to comply with the 4096/1024 message limit) - Added constructor
ChatAdministratorRights(bool)to set all fields to true or false (except IsAnonymous) - Added helper property
message.IsServiceMessageto detect service messages vs content messages - Added helper property
ChatMemberRestricted.IsMutedto detect if restriction is muting the user (v22.5.1)
Builds & Releases:
- Dropped Azure DevOps builds in favor of GitHub Actions
→ Our alternative nuget feed will no longer be updated since we are back on Nuget.org - “Prerelease” versions are now pushed to Nuget.org as the library is developed, for people who want to test upcoming features early
→ You can provide feedback on these versions and help us detect problems before the next stable release - Now including Release Notes as part of Nuget packages
→ You can see them on nuget.org package page, or in your IDE’s Package Manager, on the Package Detail pane where you select a version.
2 small breaking changes:
- Merged
AnswerShippingQuerymethod overloads. You’ll need to adderrorMessage:in your code to pass that argument and indicate failure. - The
Poll.Typeis now an enumPollTypeinstead ofstring
What’s new in version 22.6
- Support for Bot API 9.1
ReplyParameters(Message)supports null- Fix
MessageLink()for non-topics group TransferGift: fix type for newOwnerChatId- Sealed some internal types for performance
- faster
IsServiceMessage
What’s new in version 22.6.2
- Support for Bot API 9.2
- Added
ChatMember.ExpireDatehelper (= genericUntilDate) - implicit
InputFile(string)InputFileId(string)now allowsnullstring (and return null)
What’s new in version 22.7
- New all-in-one helper method
SendHtml(which supports<img> <video> <file> <preview> <keyboard>tags)
👉 see SendHtml documentation for more details - Changed type
int->longfor fieldsTopicId,StarCount,Amount - Changed
messageThreadIdarg position onSendPaidMedia
What’s new in version 22.7.3
- Implicit
LinkPreviewOptionsfrom an URL string - Implicit conversion from
List<>andList<List<>>to reply markup - Fix SendHtml with
switch_inline="query"buttons - Fix EditMessageText/Caption optional arg order (similar to Send methods)
- Clarify polling methods descriptions.
- Removed IUpdateReceiver/DefaultUpdateReceiver classes (loop code moved directly into Polling)
- Obsoleted AsyncEnumerableReceivers
What’s new in version 22.7.4
- Added
ReplyMarkup.RemoveKeyboard/ForceReply - Implicit
ReplyMarkupconversion for (text, callback/url) tuple(s)
What’s new in version 22.7.6
SendHtmlnow returnsMessage[]- Support
&<>"in SendHtml and HtmlText.Escape - Also generating
"in msg.ToHtml() - Fix ChatId operator
==: true if both chatId are null, true for different casing username (@channel == @CHANNEL) - Override ToString for
InputFile*classes : FileId, Url, “stream://..” - Added ApiResponse to JsonBotSerializerContext (trimmed apps)
What’s new in version 22.8
- Support for Bot API 9.3
- Helper methods
EditHtml/EditHtmlInlineto edit message and media group via an HTML string HtmlText.Truncatehelpers ignores invalid & sequences- Removed AsyncEnumerableReceivers classes
What’s new in version 22.9.0
- Support for Bot API 9.4
- Implicit construction of
ChatIdfromUser - fix type (int -> long) for
Rating&Amountfields
What’s new in version 22.9.5.3
- Support for Bot API 9.5
- Support
MessageEntity.UnixTimeinToHtml/ToMarkdown SendHtml: support button’sstyle=andicon=
What’s new in version 22.9.6.2
- Support for Bot API 9.6
- To port existing
SendPollcalls, replace optional parametercorrectOptionId: NwithcorrectOptionIds: [N] - Added
(Inline)KeyboardButtonconstructors for all button types because theWith*helpers don’t allow to set additional properties like Style &IconCustomEmojiId - Also supporting style & emoji in tuples implicit conversion to
(Inline)KeyboardButton - Implicit conversion
LoginUrl<=> string - Support
InputFiledeserialization
What’s new in version 22.10.0
- Support for Bot API 10.0
Migration guide for version 21.x
Important notes:
- Don’t bother about version 20, migrate directly to version 21.*
- You won’t find this version on Nuget: It was available on our own nuget package feed.
- Version 21.10 supports Bot API 7.9 (including Telegram Stars payments)
- Library is now based on System.Text.Json and doesn’t depend on NewtonsoftJson anymore. (See below)
Renamed parameter replyToMessageId: → replyParameters:
That parameter was renamed and you can still pass a messageId for simple replies.
Or you can pass a ReplyParameters structure for more advanced reply configuration.
Renamed parameter disableWebPagePreview: → linkPreviewOptions:
That parameter was renamed and you can still pass true to disable web preview.
Or you can pass a LinkPreviewOptions structure for more precise preview configuration.
Changed bool? → bool
Many boolean parameters or fields are now simply of type bool.
In most cases, it shouldn’t impact your existing code, or rather simplify it. Previously null values are now just false.
Changed ParseMode? → ParseMode
When you don’t need to specify a ParseMode, just pass default or ParseMode.None.
Better backward-compatibility and simplification of code
We added/restored features & implicit conversions that make your code simpler:
InputFile: just pass astring/Streamfor file_id/url/stream content (as was possible in previous versions of Telegram.Bot)InputMedia*: just pass anInputFilewhen you don’t need to associate caption or suchMessageId: auto-converts to/fromint(and also fromMessage)ReactionType: just pass astringwhen you want to send an emojiReactionType: just pass alongwhen you want to send a custom emoji (id)- Some other obvious implicit conversion operators for structures containing a single property
- No more enforcing
init;properties, so you can adjust the content of fields as you wish or modify a structure returned by the API (before passing it back to the API if you want) - No more JSON “required properties” during deserialization, so your old saved JSON files won’t break if a field is added/renamed.
- Restored some
MessageTypeenum values that were removed (renamed) recently (easier compatibility)
MaybeInaccessibleMessage
This class hierarchy was introduced in Bot API 7.0 and broke existing code and added unnecessary complexity.
This was removed in our library v21 and you will just receive directly a Message (as before).
To identify an “inaccessible message”, you can just check message.Type == MessageType.Unknown or message.Date == default.
Chat and ChatFullInfo
In previous versions, the big Chat structure contained many fields that were filled only after a call to GetChatAsync.
This structure is now split into Chat and ChatFullInfo structures.
The new Chat structure contains only common fields that are always filled.
The new ChatFullInfo structure inherits from Chat and is returned only by GetChatAsync method, with all the extra fields.
Request structures
Request structures (types ending with Request) are NOT the recommended way to use the library in your projects.
They are to be considered as low-level raw access to Bot API structures for advanced programmers, and might change/break at any time in the future.
If you have existing code using them, you can use the MakeRequestAsync method to send those requests.
(Other methods based on those requests will be removed soon)
Payments with Telegram Stars
To make a payment in Telegram Stars with SendInvoiceAsync, set the following parameters:
providerToken:nullor""currency:"XTR"prices:with a single price- no tip amounts
Webhooks with System.Text.Json
The library now uses System.Text.Json instead of NewtonsoftJson.
To make it work in your ASP.NET projects, you should now:
- Remove package Microsoft.AspNetCore.Mvc.NewtonsoftJson from your project dependencies
- Follow our Webhook page to configure your web app correctly
Note: When deploying a .NET 6+ build via Docker, this introduced a dependency on ASP.NET Core. See this issue for methods to update your Dockerfile
InputPollOption in SendPollAsync
SendPollAsync now expect an array of InputPollOption instead of string.
But we added an implicit conversion from string to InputPollOption, so the change is minimal:
// before:
await bot.SendPollAsync(chatId, "question", new[] { "answer1", "answer2" });
// after:
await bot.SendPollAsync(chatId, "question", new InputPollOption[] { "answer1", "answer2" });
Global cancellation token (v21.2)
You can now specify a global CancellationToken directly in TelegramBotClient constructor.
This way, you won’t need to pass a cancellationToken to every method call after that (if you just need one single cancellation token for stopping your bot)
Polling system now catch exceptions in your HandleUpdate code (v21.3)
Warning
That’s a change of behaviour, but most of you will probably welcome this change
If you forgot to wrap your HandleUpdateAsync code in a big try..catch, and your code happen to throw an exception,
this would previously stop the polling completely.
Now the Polling system will catch your exceptions, pass them to your HandleErrorAsync method and continue the polling.
In previous versions of the library:
- ReceiveAsync would throw out the exception (therefore stopping the polling)
- StartReceiving would pass the exception to HandlePollingErrorAsync and silently stop the polling
If you still want the previous behaviour, have your HandleErrorAsync start like this:
Task HandleErrorAsync(ITelegramBotClient bot, Exception ex, HandleErrorSource source, CancellationToken ct)
{
   if (source is HandleErrorSource.HandleUpdateError) throw ex;
   ...
New helpers/extensions to simplify your code (v21.5)
- When replying to a message, you can now simply pass a
Messagefor replyParameters: rather than aMessage.MessageId Update.AllTypesis a constant array containing allUpdateTypes. You can pass it for the allowedUpdates: parameter (GetUpdatesAsync/SetWebhookAsync)- Message has now 2 extensions methods:
.ToHtml()and.ToMarkdown()to convert the message text/caption and their entities into a simple Html or Markdown string. - You can also use methods
Markdown.Escape()andHtmlText.Escape()to sanitize reserved characters from strings - Reply/Inline Keyboard Markup now have construction methods to simplify building keyboards dynamically:
var replyMarkup = new InlineKeyboardMarkup()
    .AddButton(InlineKeyboardButton.WithUrl("Link to Repository", "https://github.com/TelegramBots/Telegram.Bot"))
    .AddNewRow().AddButton("callback").AddButton("caption", "data")
    .AddNewRow("with", "three", "buttons")
    .AddNewRow().AddButtons("A", "B", InlineKeyboardButton.WithSwitchInlineQueryCurrentChat("switch"));
- Same for ReplyKeyboardMarkup (and you can use
new ReplyKeyboardMarkup(true)to resize keyboard)
As previously announced, the Request-typed methods are gone.
But you can still send Request structures via the MakeRequestAsync method.
Simplified polling with events (v21.7)
Instead of StartReceiving/ReceiveAsync system, you can now simply set 2 or 3 events on the botClient:
bot.OnMessage += ...to receive Message updatesbot.OnUpdate += ...to receive other updates (or all updates if you don’t setOnMessage)bot.OnError += ...to handle errors/exceptions during polling or your handlers
Note: Second argument to OnMessage event specifies which kind of update it was (edited, channel or business message?)
When you assign those events, polling starts automatically, you don’t have anything to do.
Polling will stop when you remove (-=) your events, or when you cancel the global cancellation token
You can also use await bot.DropPendingUpdatesAsync() before setting those events to ignore past updates.
The Console example project has been updated to demonstrate these events.
Automatic retrying API calls in case of “Too Many Requests” (v21.9)
If Telegram servers fail on your API call with this error and ask you to to retry in less than 60 seconds, TelegramBotClient will now automatically wait for the requested delay and retry sending the same request up to 3 times.
This is configurable using Options on the constructor:
using var cts = new CancellationTokenSource();
var options = new TelegramBotClientOptions(token) { RetryThreshold = 120, RetryCount = 2 };
var bot = new TelegramBotClient(options, cancellationToken: cts.Token);
*️⃣ This is a change of behavior compared to previous versions, but probably a welcome one.
To disable this system and keep the same behavior as previous versions, use RetryThreshold = 0
Notes for advanced users:
- If this happens while uploading files (InputFile streams), the streams will be reset to their start position in order to be sent again
- If your streams are non-seekable (no problem with MemoryStream/FileStream), the full HTTP request to Bot API will be buffered before the first sending (so it can lead to a temporary use of memory if you’re sending big files)
Migration guide for version 19.0
Topics in Groups
New topics functionality allow bots interact with users in topic specified by messageThreadId parameter.
We try to keep our Bot API implementation as close to Telegram Bot API as possible. This means, that the new messageThreadId now the first optional parameter for a variety of methods.
Consider to use named parameters to avoid confusion with changed parameter order.
-Message message = await bot.SendTextMessageAsync(
-    _fixture.SupergroupChat.Id,
-    "Please click on *Notify* button.",
-    cancellationToken);
+Message message = await bot.SendTextMessageAsync(
+    chatId: _fixture.SupergroupChat.Id,
+    text: "Please click on *Notify* button.",
+    messageThreadId: threadId,
+    cancellationToken: cancellationToken);
New InputFile Hierarchy
Old InputMedia* class hierarchy poorly reflected actual file-related APIs.
We removed old hierarchy of InputFile related classes such as InputOnlineFile, InputTelegramFile, InputFileStream, etc., and also removed all implicit casts to them. From now on you should explicitly specify one of file types: InputFileStream for Stream content, InputFileUrl for URL and InputFileId if you want to use existing file_id. For convenience the base InputType class has factory methods to create the correct types:
InputFile.FromStream(Stream stream, string? fileName = default)for streamsInputFile.FromString(string urlOrFileId)for URLs or file idsInputFile.FromUri(Uri url)- for URLs as stringsInputFile.FromUri(string url)- for URLs asURIsInputFile.FromFileId(string fileId)- for file ids
The migration scheme looks like that:
| Previous method | New method |
|---|---|
new InputTelegramType(string) | InputFile.FromId(string), InputFile.FromString(string) |
new InputTelegramType(Stream, string?) | InputFile.FromStream(Stream, string?) |
new InputFileStream(Stream) | InputFile.FromStream(Stream) |
new InputOnlineFile(string) | InputFile.FromId(string), InputFile.FromString(string), InputFile.FromString(string), InputFile.FromUrl(string), InputFile.FromUrl(Uri) |
new InputOnlineFile(Stream, string?) | InputFile.FromStream(Stream, string?) |
raw Stream | InputFile.FromStream(Stream) |
raw string | InputFile.FromString(string) |
raw URI | InputFile.FromUrl(URI) |
ChatId implicit conversion
Implicit conversion from ChatId to string was removed due to complaints and problems it caused. The migration path is to explicitly call ChatId.ToString() method.
Stickers
- All methods and types with animated, static and video sticker distinction were removed and replaced with a single set of sticker related methods per new Bot API updates:
AddAnimatedStickerToSetAsync,AddStaticStickerToSetAsync,AddVideoStickerToSetAsync, etc. Remove the wordsStatic,AnimatedandVideofrom sticker related methods in your code - Associated emojies and masks were moved to a separate type
InputSticker, use them there instead, consult the official Bot API docs for a more detailed information
.NET Core 3.1 removed as a separate target framework
Since .NET Core 3.1 LTS status is not officialy supported anymore we changed the target to netstandard2.0 and net6.0 instead. If you’re using .NET Core 3.1 or .NET 5 runtimes you need to use the build for netstandard2.0 instead. If you relied on IAsyncEnumerable implementation of poller you need to move to .NET 6 instead.
Other changes
Message.TypereturnsMessageType.Animationwhen the message contains anAnimation, useMessageType.Animationinstead ofMessageType.Documentto check if the message contains an animation- Property
CanSendMediaMessageswas removed from the typesChatMemberRestrictedandChatPermissionsand replaced with more granular permissions, use them instead - Removed method
GetChatMembersCountAsync, useGetChatMemberCountAsync - Removed method
KickChatMemberAsync, useBanChatMemberAsync - Properties and types
VoiceChatEnded,VoiceChatParticipantsInvited,VoiceChatScheduled,VoiceChatStartedremoved, use methods and types which start withVideo*instead - All propties with the word
Thumbin them were renamed to contain the wordThumbnailper new Bot API updates - A new type
InlineQueryResultsButtonis used instead ofSwitchPmTextandSwitchPmParameterproperties, consult the official Bot API docs
Migration guide for version 18.0
Most breaking changes in v18 come from new Bot API changes, such as:
- In Bot API 6.0
voice_chat*related message properties were deprecated in favour ofvideo_chat*with the same semantics and shape. - With introduction of video stickers in Bot API 5.7 we needed a way
to separate methods for different sticker types. So static .WEBP
*StickerSet*methods and requests were given aStaticprefix. - Removed
untilDateparameter fromTelegramBotClientExtensions.BanChatSenderChatAsyncmethod andUntilDateproperty fromBanChatSenderChatRequestclass. - As of the next update some users will be able to upload up to 4GB files, so we changed
FileBase.FileSizetype tolong?. - A new way of configuring the client.
ApiRequestEventArgscontains full request data.
Complete list of changes is available in CHANGELOG
1. Removal of VoiceChat* properties in Message object
Telegram renamed voice_chat_* properties in the Message class and with video_chat_* onces so we replaced
corresponding MessageType enum members with the new ones.
Following properties in Message class and corresponding enum members in MessageType enum were changed:
-VoiceChatScheduled
-VoiceChatStarted
-VoiceChatEnded
-VoiceChatParticipantsInvited
+VideoChatScheduled
+VideoChatStarted
+VideoChatEnded
+VideoChatParticipantsInvited
Also property CanManageVoiceChats in ChatMemberAdministrator and PromoteChatMemberRequest classes was renamed to
CanManageVideoChats.
2. Renaming static sticker methods and classes
With introduction of video stickers in Bot API 5.7 we needed a way
to separate methods for different sticker types. We already used Animated and Video suffix for methods related to animated
and video stickers so we decided to do the same for the static stickers:
- Classes
CreateNewStickerSetRequestandAddStickerToSetRequestwere renamed toCreateNewStaticStickerSetRequestandAddStaticStickerToSetRequest. - Methods
CreateNewStickerSetAsyncandAddStickerToSetAsyncwhere renamed toCreateStaticNewStickerSetAsyncandAddStaticStickerToSetAsync.
3. Removal of untilDate parameter from BanChatSenderChatAsync method and UntilDate property from BanChatSenderChatRequest class
The untilDate parameter from TelegramBotClientExtensions.BanChatSenderChatAsync method and UntilDate property from BanChatSenderChatRequest class were removed from the Bot API.
4. Lifting of the FileSize limit
As of the next update some users will be able to upload up to 4GB files, so we changed FileBase.FileSize type to long? to accommodate this change.
5. A new way of client configuration
Starting with this release client configuration parameters should be passed through TelegramBotClientOptions class.
You need to create an instance of TelegramBotClientOptions and pass it to the client:
using Telegram.Bot;

var options = new TelegramBotClientOptions(
    token: "<token>"

    // pass an optional baseUrl if you want to use a custom bot server
    baseUrl: "https://custombotserverdomain.com",

    // pass an optional flag `true` if you want to use test environment
    useTestEnvironment = true
);

var client = new TelegramBotClient(options);
If you don’t know about test environment you can read more about it in the official documentation.
If you don’t need extra configuration options you can still use the constructor that accepts a token and an instance of HttpClient:
var client = new TelegramBotClient("<token>");
6. Polling functionality in the core library
The latest biggest change which is not a breaking one, but nevertheless worth a note: deprecation of
Telegram.Bot.Extensions.Polling package.
All the functionality from the package was merged into the core library under namespace Telegram.Bot.Polling.
Name of the method HandleErrorAsync in IUpdateHandler interface was quite confusing from the beginning since a lot
of people assumed they can handle all errors in it, but in reality it’s used only for handling errors during polling.
We decided to give it a more appropriate name: HandlePollingErrorAsync.
Migration guide for version 17.0
There are several breaking changes in v17:
- New exceptions handling logic
- Removal of update and message events
- Removal of API methods from
ITelegramBotClientinterface and moving them into extension methods in the same namespace (that shouldn’t break anyone’s sources as long as they don’t employ reflection or make their own interface implementations) - Working with default enum values
These are the most user facing breaking changes you should be aware of during migration.
Let’s dive deep on the migrations.
New exceptions handling logic
v17 brings a new base type for exceptions: RequestException. ApiRequestException inherits from RequestException and is thrown only when an actual error response with the correct body is received from the Bot API. In other situations RequestException will be thrown instead containing actual exception as InnerException if there is one, e.g. serialization or connection-related exceptions.
If you used ApiRequestException and HttpRequestException to handle most exception now you have to replace HttpRequestException with RequestException and look for the inner exception. All valid errors with JSON body from Telegram are now thrown as ApiRequestException including 429: Too Many Requests.
Since 5XX responses don’t usually include correct JSON body they are thrown as RequestException with HttpRequestException inside.
Look at the following example on how to handle different kinds of exceptions. You might not need to implement everything as you see, it’s there only for demonstration purposes.
try
{
    await bot.SendTextMessageAsync(chatId, "Hello");
}
catch (ApiRequestException exception)
{
    switch (exception.StatusCode)
    {
        case 400:
            // Handle incorrect requests exceptions
            break;
        case 401:
            // Handle incorrect bot token exception (revoked tokens)
            break;
        case 403:
            // Handle authorization exceptions (blocked users, unaccessible chats, etc)
            break;
        case 429:
            // Handle rate limiting exception
            break;
        default:
            // Handle other errors with valid json body: it includes status code and description of the error
            break;
    }
}
catch (RequestException exception)
{
    if (exception.InnerException is HttpRequestException httpRequestException)
    {
        // Handle connection exceptions or 5XX exceptions from the Bot API
    }
    else if (exception.InnerException is JsonSerializationException serializationException)
    {
        // Handle serialization exception when a request or a response can't be serialized for some reason
    }
    else
    {
        // Handle all other exceptions
    }
}
catch (OperationCancelledException exception)
{
    // Handle cancellation exception, e.g. when CancellationToken is cancelled
}
Removal of events
In v17 we removed events and introduced a new way of getting updates with Telegram.Bot.Extensions.Polling package. You can find an example in First Chat Bot article.
Removal of API methods from ITelegramBotClient interface
This change shouldn’t affect most users, the methods are still there, but instead of being implementations of the interface they are now extension methods. It makes the interface leaner and easier to implement for custom clients and for decorators (e.g. rate limiters implemented as decorators). There isn’t really a migration path for those who used these for some reason.
Working with default enum values
We changed how we work with enums. The most notable change is the default value: there is none, all our enums are now start with 1 (exception UpdateType and MessageType since they are not a part of the Bot API and we fully control these). 0 value is left unassigned for a purpose: if we encounter an unknown value in the response from the Bot API we assign 0 as its value.
Let’s imagine that Telegram adds new MessageEntity value. From now on all unknown values can be handled in the default case of switch statement.
MessageEntity entity = message.Entities.First();

switch (entity.Type)
{
    case MessageEntityType.Username:
        // ...
        break;
    case MessageEntityType.Command:
        // ...
        break;
    default:
        // All unknown values will go there
        break;
}
Also some default enums values were removed, e.g. ParseMode.Default since we started using nullable types for every optional value and ParseMode.Default lost it’s use. If a message doesn’t have any markup you’ll receive null in places where ParseMode type was used or if you want to explicitly indicate an absence of markup pass null instead.
Other breaking changes
Constructor accepting IWebProxy
We removed constructor accepting IWebProxy. Now you have to configure HttpClient yourself to use proxy. You can find examples in Working Behind a Proxy article.
InputMediaType
Property Type in IInputMedia was changed to an enum InputMediaType for easier discoverability. So if you relied string values like photo, video, animation and so on now you need to switch to using enums. As a result you’ll get autocomplete in IDEs and more predictability of what types of input media there are.
EncryptedPassportElementType
Property Type of EncryptedPassportElement was replace with an enum for the same reason with EncryptedPassportElementType enum.
ChatMember
As part of Bot API 5.3 implementation ChatMember type was split into a hierarchy of types with a discriminator field Status. If you need to access some data from the derived class you should use pattern matching or type casting like this:
ChatMember member = ... //;

if (chatMember is ChatMemberKicked kickedMember)
{
    // now you can access properties of a kicked chat member
    if (kickedMember.Until is not null)
    {
        // do something with the value of Until
    }
}
ChatId
Fields Identifier and Username are now get-only properties. It shouldn’t break most people’s code as it’s not a source breaking change. If you used reflection to find these fields you should to look for properties now.
InlineQueryResultBase
Type InlineQueryResultBase is renamed to InlineQueryResult to match Bot API type hierarchy.
Nullability
From now on all properties that are optional will use nullable types, e.g. int?, string?, because default values of such properties might be an actual values and isn’t distinguishable from a lack of value. From now if a property is null you can be sure that it’s value was not present in a response from the Bot API.
ReplyKeyboardMarkup
Since ResizeKeyboard and OneTimeKeyboard are optional, we removed them from ReplyKeyboardMarkup constructor. You have to use object initialization syntax to configure these properties:
var replyKeyboardMarkup = new ReplyKeyboardMarkup(
    new KeyboardButton[][]
    {
        new KeyboardButton[] { "1.1", "1.2" },
        new KeyboardButton[] { "2.1", "2.2" },
    })
    {
        ResizeKeyboard = true
    };
Migration guide for version 14.x
Date and Time
All DateTime values are now in UTC format. Here are some examples of usage:
// Use UTC time when making a request
await bot.KickChatMemberAsync(
    chatId: -9876,
    userId: 1234,
    untilDate: DateTime.UtcNow.AddDays(2)
);
// Convert to local time (not recommended though)
DateTime localTime = update.Message.Date.ToLocalTime();
Keyboard Buttons
Many keyboard button types are removed from project. It is more convenient to use factory methods on KeyboardButton and InlineKeyboardButton classes.
Here are some examples:
// Message having an inline keyboard button with URL that redirects to a page
await bot.SendTextMessageAsync(
    chatId: -9876,
    text: "Check out the source code",
    replyMarkup: new InlineKeyboardMarkup(
        InlineKeyboardButton.WithUrl("Repository", "https://github.com/TelegramBots/Telegram.Bot")
    )
);
// Message to a private chat having a 2-row reply keyboard
await bot.SendTextMessageAsync(
    chatId: 1234,
    text: "Share your contact & location",
    replyMarkup: new ReplyKeyboardMarkup(
        new [] { KeyboardButton.WithRequestContact("Share Contact") },
        new [] { KeyboardButton.WithRequestLocation("Share Location") },
    )
);
GetFileAsync()
Downloading a file from Telegram Bot API has 2 steps (see docs here):
- Get file info by calling
getFile - Download file from
https://api.telegram.org/file/bot<token>/<file_path>
GetFileAsync() is replaced by 3 methods. Method GetInfoAndDownloadFileAsync() looks very similar to old GetFileAsync():
// Gets file info and saves it to "path/to/file.pdf"
using (var fileStream = System.IO.File.OpenWrite("path/to/file.pdf"))
{
    File fileInfo = await bot.GetInfoAndDownloadFileAsync(
        fileId: "BsdfgLg4Khdlsn-bldBD",
        destination: fileStream
    );
}
Note that calling the method
GetInfoAndDownloadFileAsync()results in 2 HTTP requests (steps 1 and 2 above) being sent to the Bot API.
There are two more methods that assist you with downloading files:
// New version of GetFileAsync() only gets the file info (step 1)
File fileInfo = await bot.GetFileAsync("BsdfgLg4Khdlsn-bldBD");

// Download file from server (step 2)
using (var fileStream = System.IO.File.OpenWrite("path/to/file.pdf")) {
    await bot.DownloadFileAsync(
        filePath: fileInfo.FilePath,
        destination: fileStream
    );
}
GetUpdatesAsync(), SetWebhookAsync()
Value All is removed from enum Telegram.Bot.Types.Enums.UpdateType. In order to get all kind of updates, pass an empty list such as Array.Empty<UpdateType>() for allowedUpdates argument.
SetWebhookAsync()
Parameter url is required. If you intend to remove the webhook, it is recommended to use DeleteWebhookAsync() instead. However, you could achieve the same result by passing string.Empty value to url argument.
AnswerInlineQueryAsync() and InlineQueryResult
Classes InlineQueryResultNew and InlineQueryResultCache are removed. InlineQueryResult has become the only shared base type for all inline query result classes.
Many shared and redundant properties are removed. This might require significant changes to your .cs files if your bot is in inline mode. Fortunately, all input query results now have constructors with only the required properties as their parameters. This is the preferred way to instantiate input query result instances e.g.:
Instead of:
// bad way. easy to get exceptions
var documentResult = new InlineQueryResultDocument
{
    Id = "some-id",
    Url = "https://example.com/document.pdf",
    Title = "Some title",
    MimeType = "application/pdf"
};
You should use:
// good way
var documentResult = new InlineQueryResultDocument(
    id: "some-id",
    documentUrl: "https://example.com/document.pdf",
    title: "Some title",
    mimeType: "application/pdf"
);
SendMediaGroupAsync()
InputMediaType is renamed to InputMedia.
ToDo
Inline Message Overloads
Many inline message methods have been replaced with their overloads.
EditInlineMessageTextAsync–>EditMessageTextAsync
ToDo
FileToSend
New classes have replaced FileToSend struct.
InputFileStream:InputTelegramFile:InputOnlineFile:
In many cases, you can use implicit casting to pass parameters.
Stream stream = System.IO.File.OpenRead("photo.png");
var message = await bot.SendPhotoAsync("chat id", stream);

string fileId = "file_id on Telegram servers";
var message = await bot.SendPhotoAsync("chat id", fileId);
ToDo. implicit casts
UpdateType and MessageType
Values in these two enums are renamed e.g. UpdateType.MessageUpdate is now UpdateType.Message.
MessageType.Service is removed. Now each type of message has its own MessageType value e.g. when a chat member leaves a group, corresponding update contains a message type of MessageType.ChatMemberLeft value.
VideoNote
Properties Width and Height are removed. Vide notes are squared and Length property represents both width and height.
Constructor Parameters Instead of Public Setters
Many types now have the required parameters in their constructors. To avoid running into problems or getting exceptions, we recommend providing all required values in the constructor e.g.:
//bad way:
var markup = new InlineKeyboardMarkup
    {
        Keyboard = buttonsArray,
        ResizeKeyboard = true
    };

// better:
var markup = new InlineKeyboardMarkup(buttonsArray)
    {
        ResizeKeyboard = true
    };